Thursday, October 10, 2013

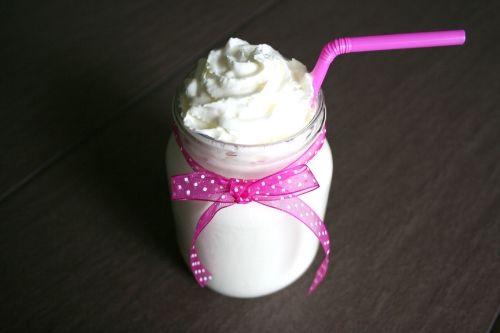
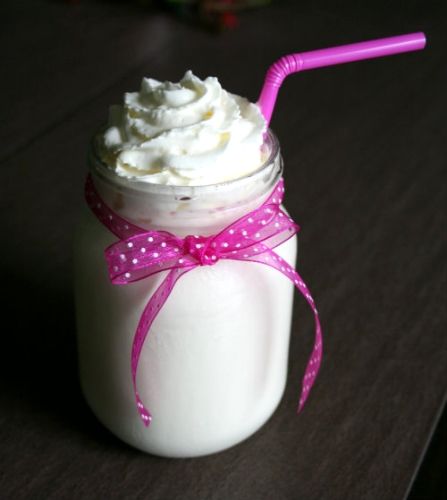
White Cake Milkshake - It brings all the boys (and girls) to the blog......

 photo 8f436184-3fd4-4133-8341-17d817b45395_zps3369496c.jpg

Darn right!  It's better than yours, I can teach you (but I won't charge)..... La la, la la la...

Okay, okay enough of those silly shenanigans! I could have also titled this post "guilt shake" because as I was getting my blender out to make it, Beckett our 6 year old says "I remember when you used to use that to make "healthy" smoothies."  Uhhhhh, thanks kid....  

I will also tell you that this milkshake won out against its competition, which was going to be a post about a copy cat Starbuck's Vanilla Bean Frappuccio recipe and I promise I will be posting it soon, but for today this milkshake will have to satisfy the craving (and I promise you IT WILL)!  I found this on Pinterest and as a lover of all things cake, ice cream and..... well let's just be honest sugar, of course it piqued my attention! I immediately pinned it and went to search for all of the ingredients!  You can find the original recipe here.  I will say that I learned one thing from this recipe.  Quality ingredients DO matter.  The original recipe calls for plain frozen vanilla yogurt.  I used plain vanilla ice cream and I FULLY confess, (as you can see in the photo) it was NOT high quality ice cream.  Because I am a "sweets snob" I could immediately taste the difference between the cheaper ice cream and what would have been had I actually sprung for the higher quality brands (and in reality only spent a dollar or two more).  Case in point, I learned my lesson.  Now that I got that confession out of the way, I can say I was the ONLY one at my house who even noticed it. It was super delicious despite my picky tastebuds.  As a matter of fact, no one else even remotely questioned the brand of ice cream I used.  They gobbled it up before I was even done photographing the original! The beauty of this milkshake is, as the title implies you can not only taste white cake flavor but ice cream with every sip!  It is amazing and quite an ingenious idea! So without further adieu.... I will introduce you to my new found obsession....
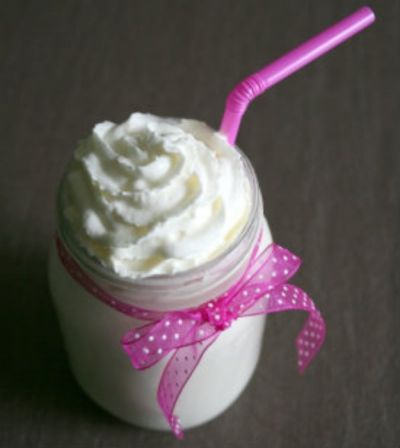
 photo acdf5f92-05c5-43c7-af60-9c333f4038f8_zps76252147.jpg

White Cake Milkshake

1 1/2 Cups of Cold Stone Creamery International Delight Sweet Cream Creamer (yes Cold Stone Creamery has International Delights creamers! (if you click on the hypertext you can see all of the flavors they offer and get a .55 cent off coupon!)  Isn't that like a dream come true?!?

1/2 Cup of white cake mix (I used Pillsbury Moist Supreme classic white)

3 Medium Scoops of plain vanilla ice cream or frozen yogurt

1/2 cup of ice (I think I used about 8-10 ice cubes and I would recommend crushing the ice thoroughly first)

Combine all of the above ingredients in a blender and mix until smooth.
Top with some whipped topping and Enjoy! 
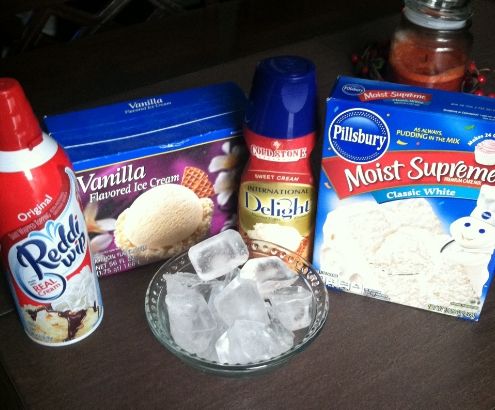
 photo 520ccbc2-ba55-4267-807c-f7dc82aae123_zps55bf3c9c.jpg

 photo 506e8aac-8556-4e69-8d8b-3587d677742c_zps515d8389.jpg


Monday, October 7, 2013

Pioneer Woman's Perfect Pot Roast (and a tale of how a former vegetarian learns to cook a big piece of meat).

 photo 7c5fa1ec-c543-4a11-aeeb-678bda2b62e2_zps5fe55ed3.jpg

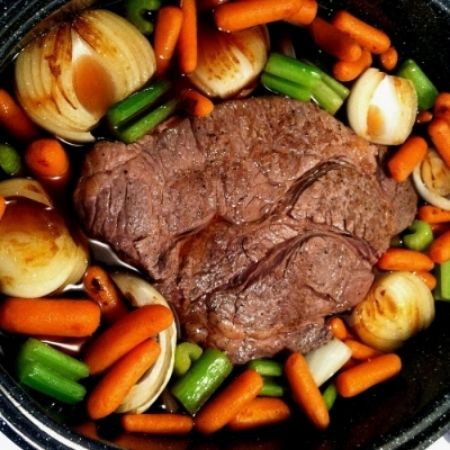
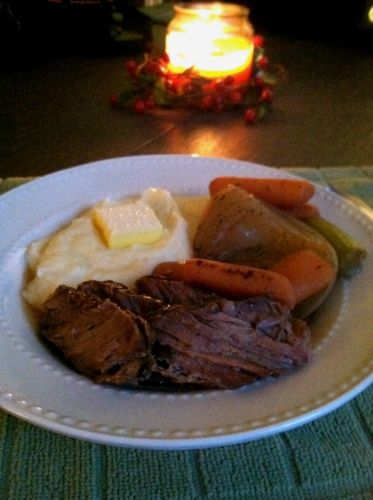
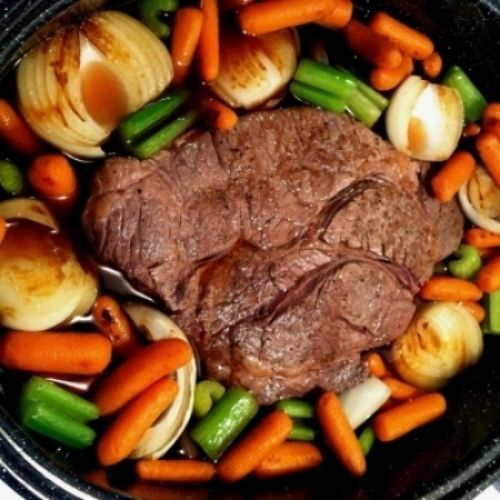
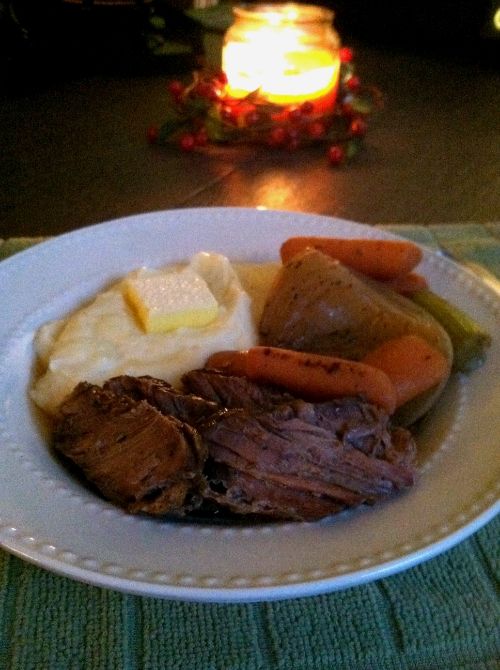
This is actually the second time that Brian and I have made this recipe. I will FULLY admit the first time he even mentioned it I was like "Huh? You want to make what?" As some of you know, I had been a vegetarian from 2004 until 2010 (see, I told you A LOT has changed since I first started blogging!) so when Brian mentioned this, I knew it was going to take some research and learning on my part.  I allowed him to choose the piece of meat (I still do this most of the time, but I will say I "think" I'm getting better at it and back into the swing of feeling welcomed into the meat department at our local grocery store).  We both set out with determination, laptops, Pinterest, Tastespotting, and Foodgawker and of course hungry bellies. We knew we found a good one when we both set our sights on Pioneer Woman's Perfect Pot Roast.  I mean c'mon, its from The Pioneer Woman!  How could it not be the perfect recipe?  You can learn more about The Pioneer Woman (although who doesn't know who SHE is???) and you can find the original recipe here.  Let me just tell you, neither time we made this were we disappointed!  It was delicious not once but TWICE!  I think the thing that really surprised me was how easy it was overall.  It took very little work (besides impatiently waiting) for what ended up being a very nice meal! We paired it with some mashed potatoes and had a very nice, fancy shamancy home cooked meal!  It's definitely a keeper and a recipe we will use for years to come!  We hope your family enjoys it as much as ours did! 

 photo 121072bb-35d1-419c-b58e-0d52ecb93c67_zpsadd84740.jpg

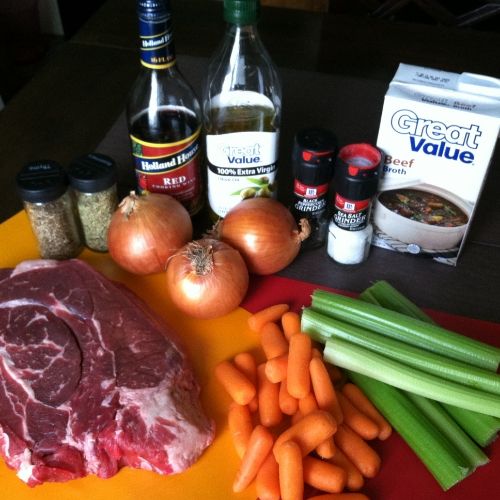
Pioneer Woman's Perfect Pot Roast:  
(Prep Time: 20 min  Cook Time: 3 -4 hours depending on roast size)

1 Whole Chuck Roast 3-4 pounds (for Brian and I we used a smaller 2.5 pound roast)
3 TBSP of Extra Virgin Olive Oil
4 medium sized yellow onions
1 lb bag of baby carrots
4 -5 stalks of celery
Salt and pepper to taste 
1 Cup of Red Wine for cooking
4 Cups of Beef Stock
1 tsp of dried Rosemary
1 tsp of dried Thyme

First and foremost, choose a nicely marbled piece of meat. This will enhance the flavor of your pot roast. Generously salt and pepper your pot roast.

Heat a large pot or Dutch oven over medium-high heat, then add 3 tablespoons of olive oil (or you can do butter/olive oil split). 

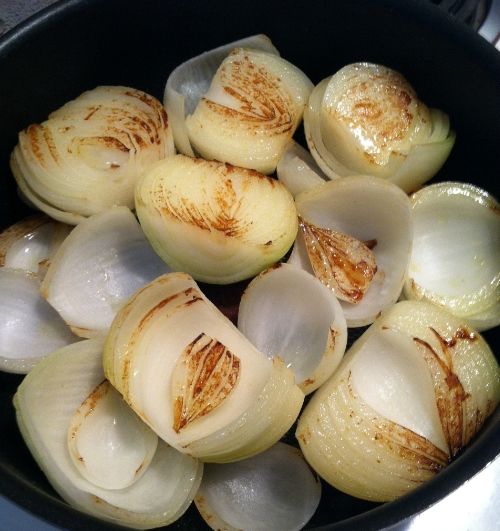
Cut 4 medium yellow onions in half and when the oil in the pot is very hot, add in the halved onions, browning them on one side and then the other. Remove the onions to a plate. 
 
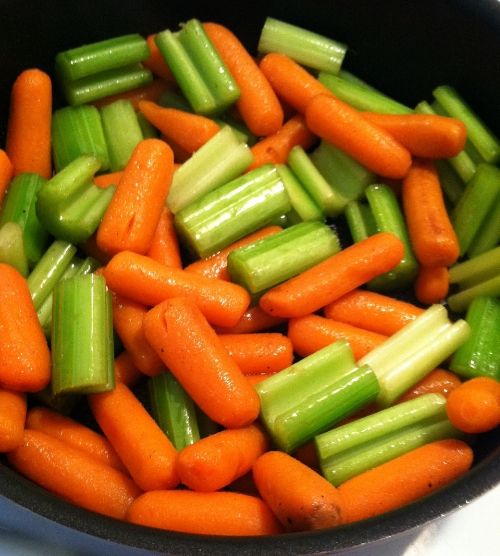
Throw the carrots and celery into the same very hot pan and toss them around a bit until slightly browned. About 1-5 min or so. 

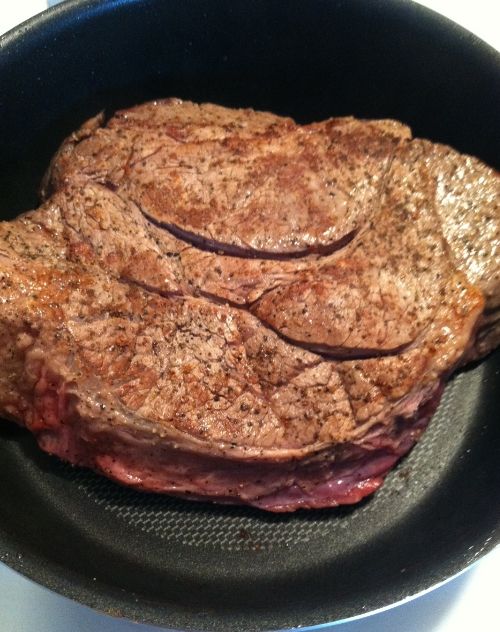
If needed, add a bit more olive oil to the very hot pan.  Place the meat in the pan and sear it for about a minute on all sides until it is nice and brown all over.  Remove the roast to a plate.

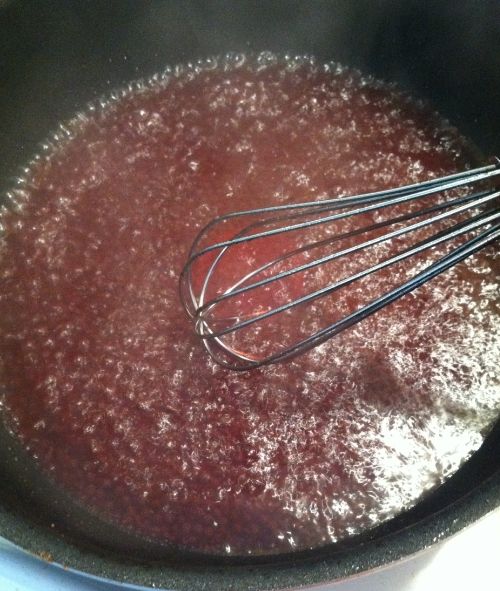
With the burner still on high, use either Red Wine or beef broth (about one cup), to deglaze the pan, scraping the bottom of the pan with a whisk to get all of the flavor up.

When the bottom of the pan is sufficiently deglazed, place the roast back into the original pan or roasting pan (if using a separate roasting pan, pour red wine/beef stock deglazing liquid over it) and add enough beef stock to cover the meat half way (about 3-4 cups).

Add in the onion, carrots and celery (as well as dried thyme and dried Rosemary).

Put the lid on, then roast in a 275 degree F oven for 3 hours (for a 3 pound roast).  For a 4-5 pound roast, plan on 4 hours. 

 photo d199b36f-5358-4f93-9e7b-7b04860d8eac_zps69f57bb1.jpg

 photo 92d1487f-5935-4a55-a985-f9ef29f905d5_zps503d73ff.jpg

 photo 031ef5ec-3102-4d0a-b1f3-8bf0a9a33cb6_zps364cb3cd.jpg

 photo e9ed5651-2d15-4952-818e-1d82446c1c8c_zps7700fe8a.jpg

 photo b824a1f6-d675-41c1-92ca-523ef0d785ff_zps63c0e5ab.jpg

 photo 341f3c8a-b6c5-40b2-be83-81a2c98c6fd3_zpsb535526d.jpg

 photo 972f1abd-883e-4f8d-87fb-658b419580e1_zps6413fea5.jpg

Tuesday, October 1, 2013

Homemade Applesauce, A.K.A "Show off applesauce"

 photo 0ae726f3-75ff-4010-b75f-5507bfcc8819_zpsb44cbecd.jpg


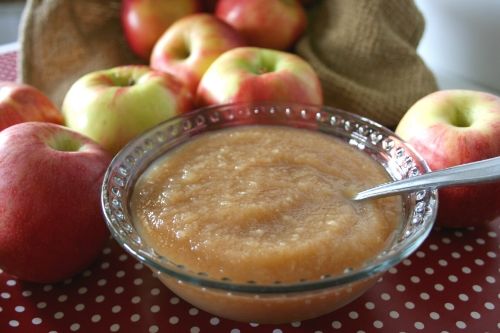
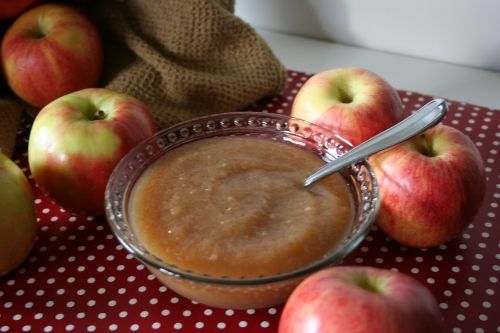
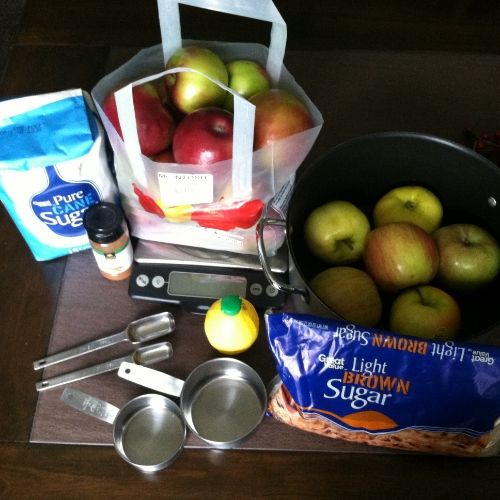
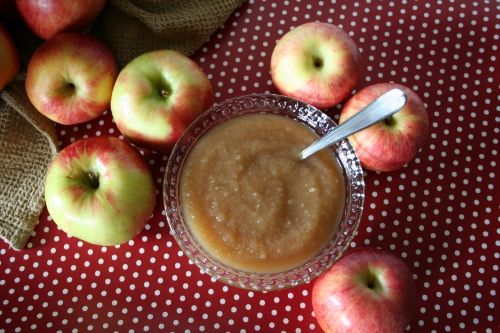
I was craving homemade applesauce the other day and I wanted to run to the farmers market to get apples. However, we were in the middle of making French Onion Soup (you can find the recipe here).  If you've ever made it, you know that if you have plans to do anything or go anywhere, you better allow enough time to shower or you will smell like a big, stinky, stanky, gigantic armpit that hasn't been bathed in months! Oh you think I'm kidding? You just try it! You will smell like onions, your clothes will smell like onions, your undergarments will smell like onions, kids, dogs and basically anything else with hair or fiber in the vicinity will also smell like onions.  It's well worth it, but my whole point is that if you are trying to get to the farmers market to get apples, it just isn't going to happen people!  The next best thing was the apple orchard, but we live in an area where we have to drive 30 minutes (each way) to get to an orchard.  The one closest to us was having a fall festival kick off and I didn't really want to fight the crowd to get a bunch of apples, and I honestly didn't feel like wasting the time or gas to get there.  I contemplated just going and buying applesauce but lets face it, it's just not as good as homemade. Additionally, I'm a newlywed and as a newlywed, who doesn't like to throw on an apron, try to look all cute and play 1950's house wife by "showing off" your cooking skills and whipping of a batch of....well in my case homemade applesauce!  My easiest option (although I admit probably not the cheapest) was to run to my local grocery store and buy apples.  I got a variety of three different types, three fuji, three golden delicious and 5 lb bag full of McIntosh apples. I told Brian it would probably make a small batch, just big enough for the two of us (and since I am used to getting a full bushel at the orchard I really had no idea what to expect I would end up with). What it ended up yielding was more than even I had anticipated.  We ended up with about 90 ounces or a little over 11 cups.  It is delicious and I got two thumbs up from everyone in the family who tried it (even Andy)!  The next time I make it I will go to the orchard and I think more than likely I will ask for windfall apples or grade B apples.  Sure they won't be as pretty, but as long as I am coming home and making them that day or the next, I think they should be fine and I'm sure much more cost effective.  I will also purchase a larger quantity and either can or freeze them so we aren't under pressure to eat quarts and quarts before it goes bad in the fridge. It's really not too hard to make and honestly the biggest pain in the butt is the prepping and peeling of the apples.  Many people have fancy peelers, but mine is 5 ft 9 and MUCH better to look at while assisting me in the process! ;)  I'll leave you with the recipe, well wishes for a fantastic fall and  hopes you enjoy the recipe as much as our family did!

 photo c289e94f-5166-437e-a238-c20fabb36926_zpsa87d5e83.jpg

Homemade Applesauce 

8 lbs of apples (I used a variety of 3 Fuji, 3 Golden Delicious and a 5 lb tote bag of McIntosh.
1 Tablespoon of lemon juice
1/2 Cup of  brown sugar
1 Cup of white sugar (I used half while cooking and reserved the other half cup after all of the apples had been cooked and blended into the applesauce)
1 Cup of water
1 and 1/2 Tablespoons of ground cinnamon.

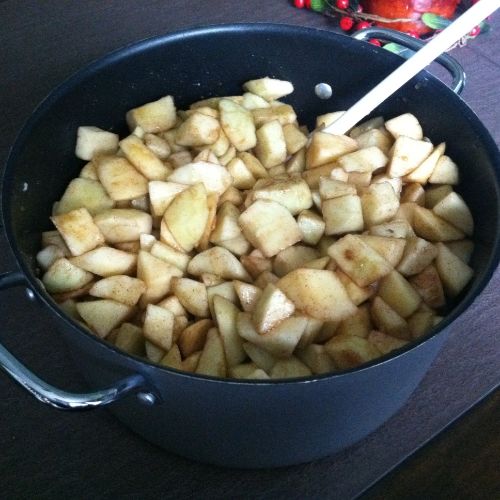
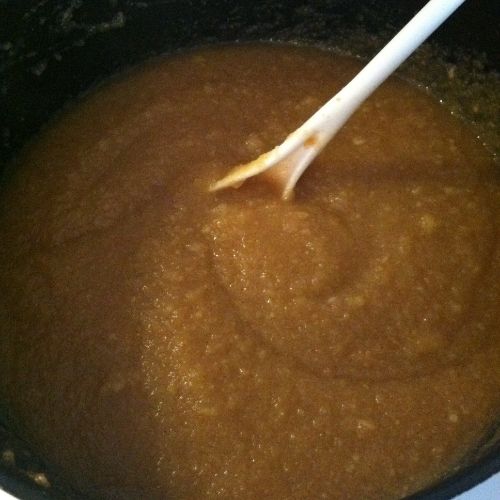
Apples should be prepared by washing, peeling and coring them.  Prior to slicing them I added one cup of water and 1 Tablespoon of lemon juice to the cooking pot I was going to be cooking the apples in.  As I sliced them, I tossed them into the water/lemon juice mixture (stirring after adding each apple) to ensure that they wouldn't brown until I had them all sliced. After all 8 lbs were prepped and sliced, I added the brown sugar, a 1/2 cup of the white sugar and the cinnamon.  I cooked them on high until they came to a rapid boil and then turned them down to simmer for 45 min. It will look like you have a moderate amount of liquid but do not drain or strain. To make the process easier, I used my Cuisinart Immersion Blender to blend into a smooth sauce (you can either blend or use a masher to achieve the same results).  You can always determine the consistency you like best, but Brian and I preferred a smoother type sauce.  Once the applesauce was cooled, I added the other 1/2 cup of white sugar.  You could also season this to your own taste by adding additional or less sugar and doing the same with cinnamon.  Allow the sauce to cool and store in the refrigerator, or if you prefer you also have the option of canning or freezing.

Enjoy!


 photo f04c7849-a67f-40f8-a40c-4f6264a2b720_zps3bd086c9.jpg


 photo 0814292d-1839-4bd7-aade-e966021bf6a1_zps19b3697e.jpg


 photo d747cfaa-9ae2-4a17-addd-2853f2447de0_zps2fe878e6.jpg


 photo f31fa032-c9f0-4c76-b687-5a8e042209ba_zps9d163c5f.jpg

I'm Back!!!!!

 photo 47696030-7023-4dcc-a16a-7e86ddaeb929_zps2fdb7a9b.jpg
I can not believe it has been YEARS, yes YEARS since I have posted on here.  I am actually ashamed when I am forced to say it out loud.  The truth is my poor little blog which I loved so much took the back seat to MANY, MANY life changes over the last few years.  When I first started my children were pretty small, they are actually now pretty self sufficient and are now 6 and 8. Back then I was making my first fondant covered cake, I have made A LOT of cakes and have learned a TON about cake decorating since then (I can't wait to show you some of my work)!  When I started this blog, I was living in Southern California and since then, I have moved back to my home state of Pennsylvania in 2010. Back then I was married and we had separated and divorced when I moved back to PA.  Since then, I met the man of my dreams, my soul mate and my best friend AND..... I just recently got married!  Friends we have A LOT to catch up on!!!  I have missed you!  I have missed blogging, I have missed cooking and baking for you and I have missed reading all of your wonderful blogs as well BUT, the good news?!?  I'M BACK!  I feel excited, refreshed and ready to get back to doing what I love most!  I am making a commitment to post new recipes, tutorials, and whatnot at least 3 times a week on this site.  In addition my husband Brian and I have started a daily "day in the life" type blog called "Life Gone Live" which will basically be a potpourri of a little of everything because as the title implies, it's basically our life, gone live on the internet and shared with all of you!  You can visit that site at http://www.lifegonelive.blogspot.com/. We also have a fan page for that blog on Facebook which you can find here.  You can check out my latest cake decorating projects and catch up on some of my work at https://www.facebook.com/pages/Playing-with-Sugar/289421543378.  That's my fan page on FB and I would love if you would join me there as well!  We will be having various giveaways on both blogs (and Facebook pages) so make sure you check back often!  Thank you so much for continuing to support my blog during my absence!  I am so grateful and blessed with the friends that I have made during my blogging journey!

Monday, September 14, 2009

WTH??? - Where The Heck have I been?????

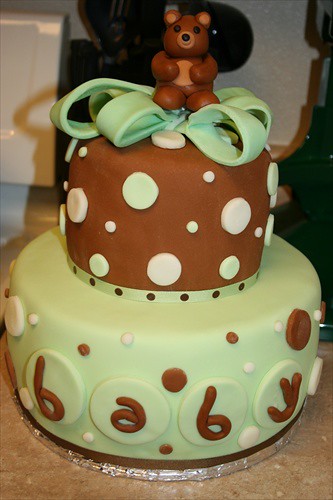
Seriously my dear readers, I can NOT believe it has been this long since I posted!!! - UGH! I miss you and baking for myself so much! I have (thankfully) had TONS of stuff going on in my life (good stuff). I have been baking cakes for others almost every weekend since my last posting AND a few other things. I hope you bear with me for just a little while longer. I have TONS of fabulous, yummy things to share with you for the fall. In the meantime I wanted to share some of what has been going on with me. The most recent cake I made is this baby shower cake. I can't help but be in love with the teddy bear! He was almost too cute to eat! It was a two tiered cake with a 10 inch white cake and strawberry filling on the bottom topped with a 6 inch strawberry cake with butter cream frosting all of which was covered with fondant and of course this adorable little bear!

Blog1

This cutie patootie surfer girl was another weekend’s project for a special 16 year olds birthday. She was made out of all fondant and the cake was a chocolate cake with strawberry filling, butter cream frosting and fondant. How cute is she???

Blog 1 - SG

Up next was Wow Wow Wubbzy for a sweet little one year olds first birthday party. They told me that she thought it looked so much like Wubbzy that she was slightly scared to eat it! It was as single layer chocolate cake frosted with butter cream frosting and covered with fondant.

Blog 1 - WWW

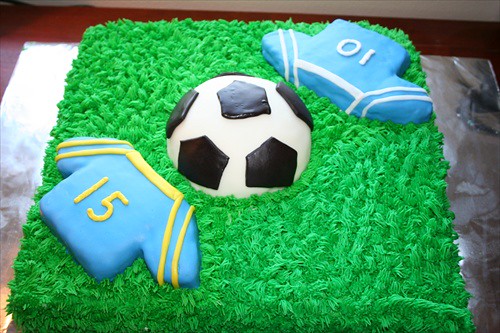
Last but not least, we have the soccer lover’s cake! This was a birthday cake for a birthday celebration shared by two little guys who love soccer. I incorporated two colors of their uniforms and of course personalized the jerseys with their individual numbers. I think they really liked it and hopefully it made a good impression with the soccer moms! It was chocolate cake with butter cream frosting. The ball and jerseys were covered in fondant.

Blog 1

I have a fabulous wedding cake that I will be working on this weekend for a very beautiful bride and I will be sure to post pics as it will be a one of a kind!

Finally, here is something else that has been distracting me from my blog (but what a wonderful & beautiful distraction she is)
Morgan Mobile

This is my 18 year old daughter Morgan. When Will got his promotion to California, Morgan decided to stay in PA to finish out her senior year. Well school is done and summer is winding down so I am proud and excited to say that Morgan is coming here to live with us!!! I have been making plans, shipping arrangements, flight arrangements, plans for going back home etc. (if anyone has any advice on shipping just clothing and shoes freight, I'd be so grateful if you'd share your knowledge and info. Thanks!) I will fly back home for a week the end of September/beginning of October to get Morgan and then after that I am all yours! Back full time and baking more than ever especially during fall which is my favorite time of the year! See you all soon!

Stacy

Monday, August 17, 2009

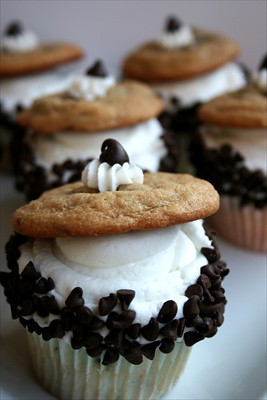
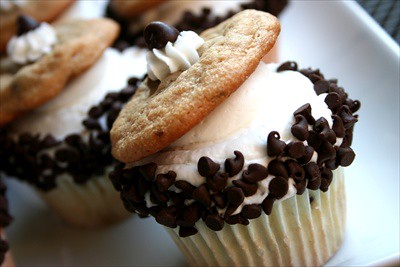
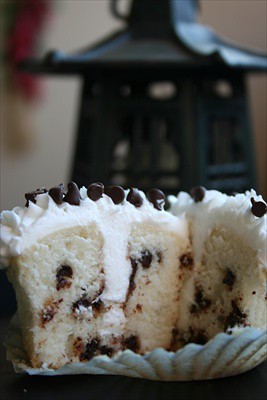
Chocolate Chip Cookie or Cupcake? HAVE BOTH! Chocolate Chip Cookie Cakes

Blog 1 - CCC

Some things a girl should never tell…her age, her weight and her favorite recipe that has potential to make money for her someday. For that very reason I wanted to make one of my favorite cupcake ideas, but I’m not quite ready to share my secret recipes for my homemade goodies yet. Wipe your tears from your eyes my friends, this one is just as good and I’ll tell you are secret, come a little closer, shhhhhhhhh, it is all made from boxed mixes with the exception of the frosting. Will came in and said “are those homemade?” to which I lovingly answered “Well they were made in our home!” LOL. But ladies and gentlemen that is as close to homemade as these get. When I can’t or don’t want to use “from scratch” recipes, I like to at the very least try to dress up an otherwise lame boxed mix. That is just what these babies are all about! They are the can’t decide between a chewy chocolate chip cookie and a heavenly cupcake? HAVE BOTH cookie cake!

Blog 4 - CCC

Ingredients:

Cupcakes:

1 white or vanilla boxed cake mix of your choice.
Water - according to directions
Oil - according to directions
Eggs - according to directions
1 Cup Mini Chocolate Chips - plus more for garnishment.
1 TBSP of all purpose flour.
Paper cupcake/muffin liners.

Butter Cream frosting:

2 Cups shortening
2 tsp clear vanilla
7 TBSP of water
2 pounds of confectioner's sugar

Cookies:

1 pkg of Betty Crocker Chocolate Chip Cookie Mix
1/2 Cup of Butter - 1 stick
1 Egg
Regular size chocolate chips for garnish

Directions:

Cupcakes:
Mix and prepare according to directions on package. Toss 1 Cup of mini chocolate chips with 1 TBSP of all purpose flour. Fold into prepared batter. Bake according to directions. Allow to cool completely.

Butter Cream Frosting:
Beat all ingredients until icing forms peaks (7-10 minutes at low speed with a heavy-duty mixer, 10-12 minutes at high speed with a hand-held mixer).
NOTE: Keep all utensils completely grease-free for proper icing consistency.
* For stiffer icing, use 1 tablespoon less water.
**When using large countertop mixer or for stiffer icing, use 1 tablespoon less water.

*Instructions can be found on the Wilton website.

Cookies:
Prepare and bake cookies according to directions.

Once cupcakes have fully cooled, I used a long cake decorator’s tip to fill the middle of the cupcake with frosting. Take the longest tip you have (preferably one with a round open end), insert it into the middle of the cupcake and squeeze. Next frost the entire top of the cupcake with butter cream frosting. Style it according to your choice. (I decorated mine using only a pastry bag with a coupler inside.) Make sure you add an extra bit of frosting to the top center of the cupcake. Next you'll want to shake a good amount of the mini chocolate chips onto a plate, roll cupcake in chocolate chips. The way I did this was dip down and lift, turn slightly, dip down and lift until all sides are thoroughly covered. Next place a well shaped chocolate chip cookie on top of the frosted cupcake slightly tilted to the side. Top with a dollop of butter cream. Last but not least, garnish with a larger sexier chocolate chip and there you have it chocolate chip cookie cakes! Enjoy!

Blog 5 - CCC


Tuesday, August 4, 2009

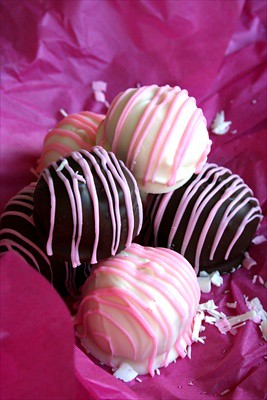
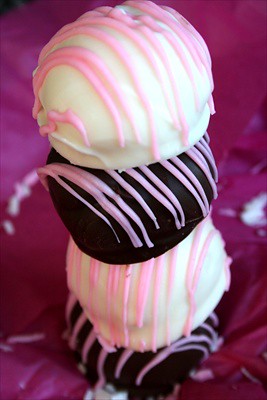
Recycling cake scraps.... Chocolate Covered Strawberry Cake Balls

Blog 3 - CB

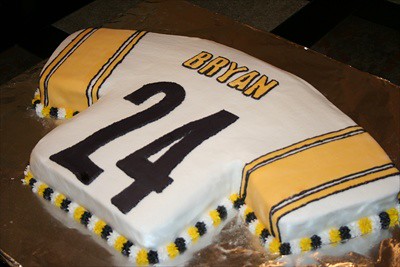
I don't know what to call these, I mean they are essentially cake balls BUT for whatever reason that just sounds so gross to me. They need a more chic name like cake truffles or cake bon bons, something. I should hold a contest to name my personally made ones. Too bad I didn't think of this sooner it would have been a perfect give a way! Bakerella does some FABULOUS things with these little delicious delights! You have to see all of the things she comes up with. Plain and simple, she ROCKS! Check her site out for complete directions and so many fabulous ideas! You can visit her by clicking here. I adapted mine slightly using vanilla frosting instead of cream cheese basically because I usually make my own frosting and therefore do not have usually have a can of store frosting around BUT I did have a can of vanilla that I found for a project that never came to be - ummmm, yeah I have way to many "good ideas" to mention that happen like that. The land of forgotten baked goods. You know those ingredients that end up being used for something other than their original intent. Oh well, all’s well that ends well right? I had cake scraps from a birthday cake that I made over the weekend. (The Steelers jersey birthday cake (for Bryan turning 24 - Happy Birthday Bryan!!!) that I mentioned in a previous post.) Blog 2 - SJ

NOTE: For the correct and entire recipe please see Bakerella's blog!!!

I used the cake scraps - or the left over cake from two 13 x 9 strawberry cakes - the crown (or top) which was cut off of both of them and about a quarter of the other 13 x 9 that I used to carve the sleeves. All in all it was probably about half of a whole 13 x 9. Did I lose you yet with all of that?

Blog 4 - CB

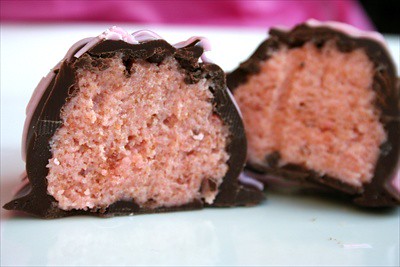
I crushed up all of the strawberry cake scraps to get them into crumbs and mixed about half of the can (15.6 oz) of vanilla frosting. Once I made sure it was thoroughly mixed, I used a cookie scoop and made approx 1 inch balls. I placed them on a cookie sheet with wax paper and placed them into the freezer for approx 6 hours until set. Once they were set enough to dip, I melted 1.5 bags of Wilton Candy Melts. (for directions on melting chocolate see my post here) (I have used Almond bark in the past). I used a toothpick inserted in the middle of the cake ball to dip into the chocolate. Once completely covered I placed on a cookie sheet covered with wax paper, drizzled on the opposing chocolate flavor and placed in the refrigerator until it was set. Viola! There you have cake balls (truffles- bon bons- LOL)! Recycling never tasted so good! ENJOY!

Blog 5 - CB