Showing posts with label cookies. Show all posts

Saturday, October 26, 2013

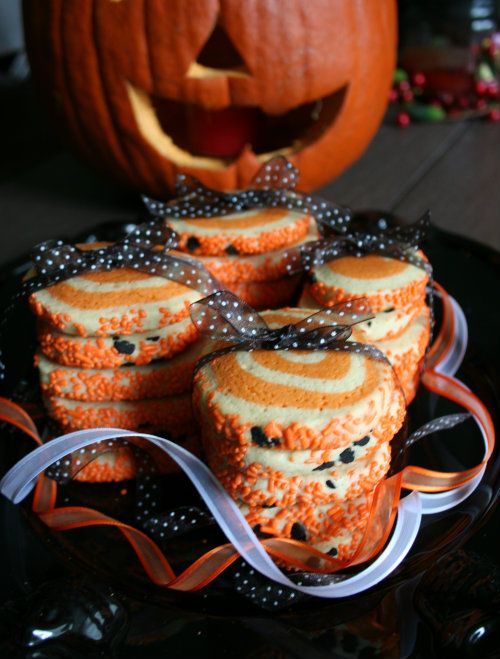
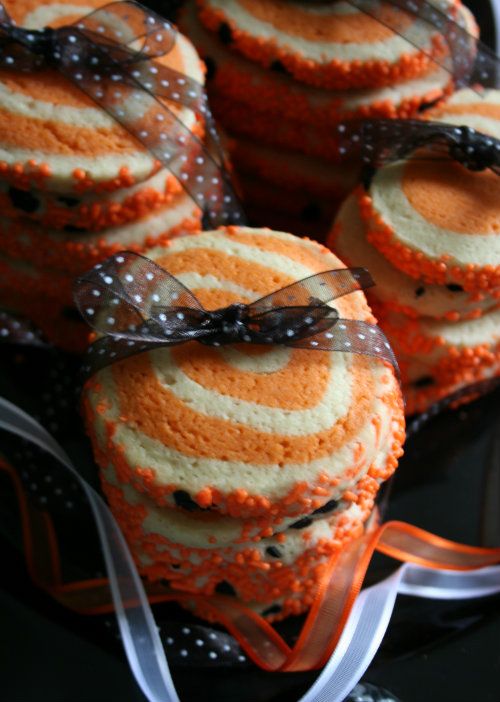
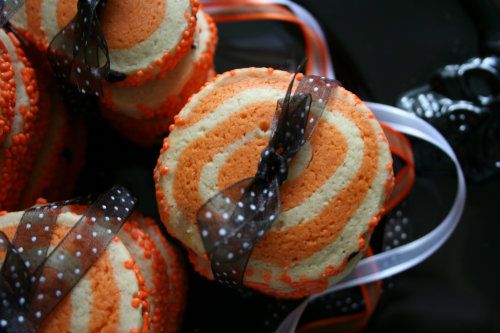
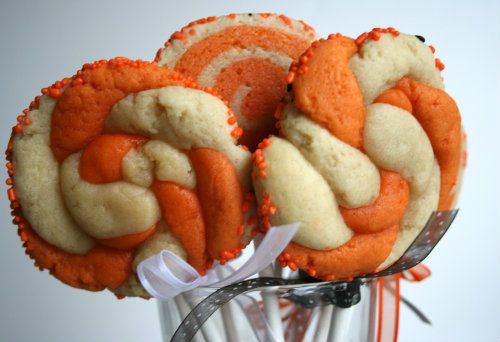
Pinwheel Halloween Sugar Cookies

 photo Blog1_zps6ecdba37.jpg

Pinterest....oh how I love thee.  I remember the days when my children were babies and during late night colic sessions, I would watch nothing but infomercials over and over and over again.  After seeing spray on hair for balding men for the 555,000 mind numbing time, I would begin to count ceiling tiles or try to find faces in the wood patterns on my furniture.  For you Moms (and Dads) just starting out consider yourself VERY lucky with smart phone technology and Pinterest! Feel blessed that you have these things to entertain and educate you while having late night party time with your little one.  Those days have LONG passed for me, however my body hasn't realized it yet and as I approach the second half of my life, I've had the pleasure (insert heavy doses of sarcasm) of developing the curse of middle of the night insomnia.  I can not begin to tell you how thankful I am for my iPhone and the Pinterest app!  I have learned to do so much from that site!  I have learned how to clean shower doors with dryer sheets, how to iron a stain out of my carpet, how to get rid of fruit flies, how to make about a trillion DIY things (including but not limited to cake pedestals from Dollar Tree candle sticks and plates), and how to entertain my children by making slime. The list goes on and on and on and on.... but the one thing I am REALLY grateful for is this sugar cookie recipe that I found on there!  It is quite possibly the best sugar cookie recipe that I have EVER tasted.  If you aren't into soft, fluffy, melt in your mouth sugar cookies, then this recipe is not for you.  It was easy to mix up, easy to work with and I probably didn't even need to refrigerate it prior to baking it!  Bonus points!  When it comes to cookie making, who wants to have to wait hours and hours prior to baking them? Not this girl over here! They would be great to use as any holiday "pinwheel type cookie", cookies on a stick, decorated cookies, drop cookies (rolled in more sugar of course!), and even cut out sugar cookies!  What a great treat these would be for your upcoming holiday party!  I can't wait to see what you've done with your own variation of this recipe!  Follow me on Instagram (@playwithsugar) or Twitter (@playwithsugar) and don't forget to tag me so I can see your work too! Happy Halloween!

 photo afef5344-adff-4399-9b7c-77ea4589b7f9_zpsc8c2cd9a.jpg
Pinwheel Halloween Sugar Cookies
(thick, soft, easy sugar cookies)

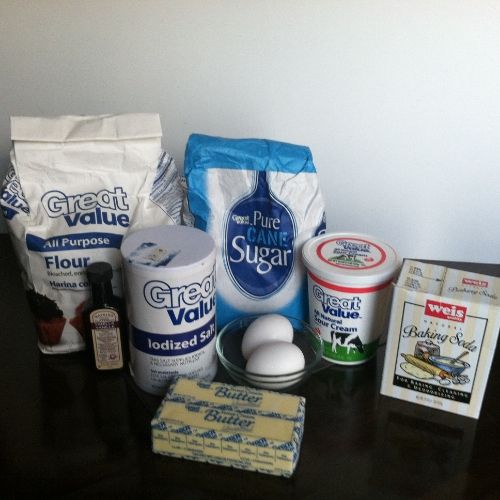
Ingredients:

1 Cup of unsalted butter
2 Cups of sugar
2 Eggs
3 teaspoons vanilla (I used J.R. Watkins Double Strength Vanilla.  If you haven't tried this you really should!)
1 Cup Sour Cream
1 teaspoon salt 
2 teaspoons baking soda
5 1/2 Cups Flour

Instructions:

In mixer, cream together butter and sugar.  Add sugar and vanilla.  Next add sour cream. Combine salt, baking soda and flour and add to the mixture.

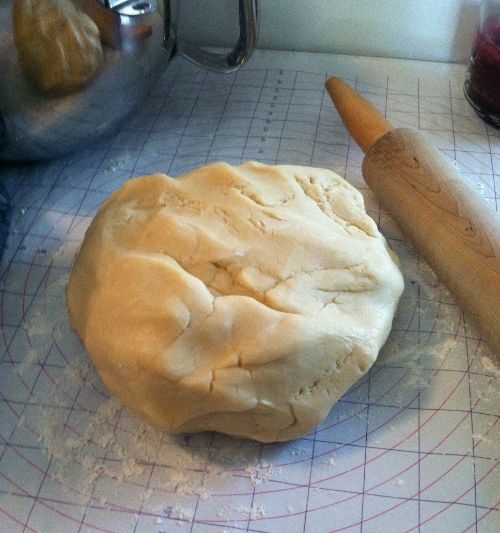
After dough is thoroughly mixed, divide dough in half. 

Keep half of the original color and set aside. Place the other half back into the mixer and add orange food coloring (amount to your liking).  I used Wilton Icing Color in Orange.  Mix on medium speed until all of the coloring has been incorporated throughout. 

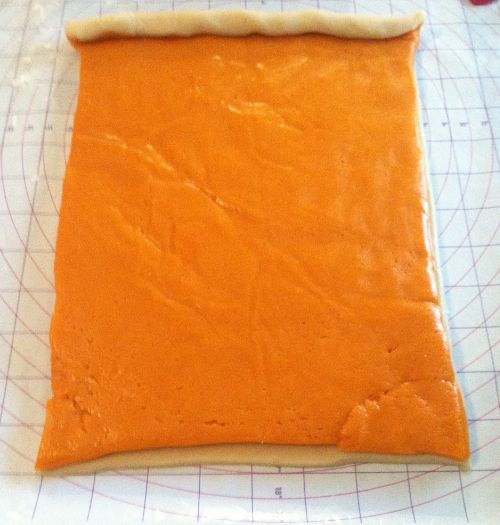
Roll out original dough (the one not colored) on a floured surface. I was very precise and cut and measured an exact rectangle (or square if you're fancier than I am at rolling!). I saved any scraps for cookies that I will tell you about a little later. Next, I did the exact same thing using the orange dyed dough.  The only difference is I rolled this out on floured pieces of waxed paper (this made it MUCH easier to transfer on top of the original dough). 

Once I had both pieces pretty much the same size, I flipped the orange dough on top of the original (basically stacking the orange on top of the white).  

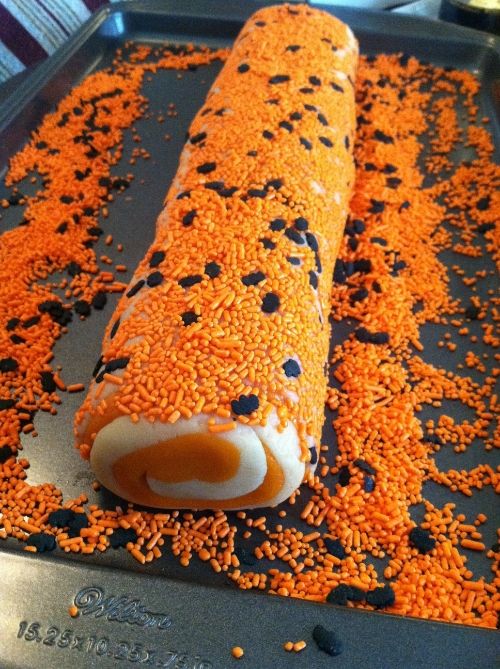
Begin rolling the dough tightly until it is all rolled up and in the shape of a log.

Lightly brush with water and roll into sprinkles of your choice. (I found it best to dump out all of my sprinkles onto a cookie sheet and then roll my cookie dough on it in order to try to contain the mess. Gently apply pressure while rolling to make them stick.)

I covered the decorated roll with saran wrap and then placed it in the refrigerator overnight. (You really only need it in the refrigerator for an hour to an hour and a half, but I was short on time so I baked mine the next day.)

Prior to baking, remove roll from refrigerator and slice into 1/4 inch slices and place on a parchment lined cookie sheet.

Bake in a 375 degree preheated oven for 7-8 min.  Cookies WILL looked under baked, but this DOES NOT mean that they aren't done. RESIST THE URGE TO BAKE LONGER!  I made the mistake (on my first batch) of thinking they needed to stay in longer and they got a little too brown on the bottom for my liking. They WILL be pale in color and no browning anywhere.  (Remember these are super soft, thick cookies and leaving them in longer will not allow you to achieve that result.)

VARIATIONS: 
 
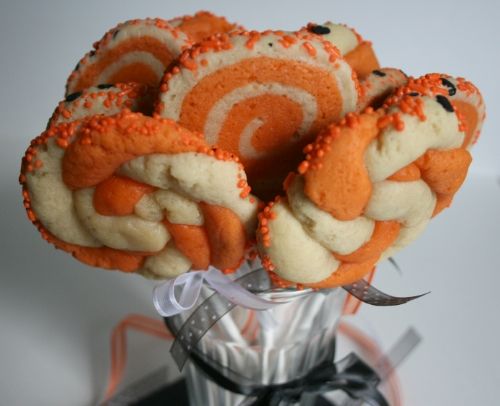
Some of the cookies I placed on a stick to form a cookie type lollipop.  Just place the stick under the cookie prior to baking and voila!

As for the other cookies, remember those scraps I talked about?  I took the original (white) cookie dough and rolled it out into a small rope like shape.  Next, I did the exact same thing with the orange.  I stacked one rope on top of the other and began two twist the two colors together (not braid, just twist).  Lastly, I began to coil it around using one end as the center wrapping the rest around it.  I apologize that I don't have any photos as this was a spur of the moment attempt to not waste dough. 

 photo Blog2_zps77782ee8.jpg

 photo 650c708d-5c46-4061-beef-90862424dbbd_zps71558539.jpg

 photo df537a54-ad32-4e9d-9db1-5c2df736aecf_zpsb203fc72.jpg

 photo 4d035550-7a7f-435d-b964-b3d259808ad1_zps1ee80fdb.jpg

 photo 9550fac2-2c32-4568-b5f9-2142bbbc02aa_zpsb524a36d.jpg

 photo Blog4_zpsb38d3e0b.jpg

 photo Blog8_zps6b942f8c.jpg


Monday, August 17, 2009

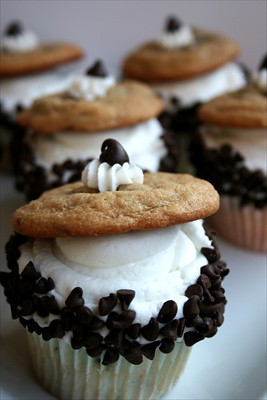
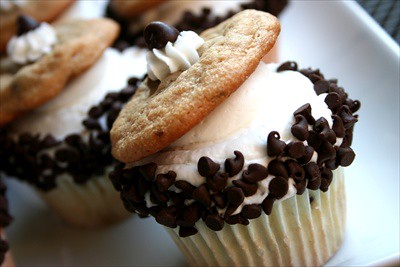
Chocolate Chip Cookie or Cupcake? HAVE BOTH! Chocolate Chip Cookie Cakes

Blog 1 - CCC

Some things a girl should never tell…her age, her weight and her favorite recipe that has potential to make money for her someday. For that very reason I wanted to make one of my favorite cupcake ideas, but I’m not quite ready to share my secret recipes for my homemade goodies yet. Wipe your tears from your eyes my friends, this one is just as good and I’ll tell you are secret, come a little closer, shhhhhhhhh, it is all made from boxed mixes with the exception of the frosting. Will came in and said “are those homemade?” to which I lovingly answered “Well they were made in our home!” LOL. But ladies and gentlemen that is as close to homemade as these get. When I can’t or don’t want to use “from scratch” recipes, I like to at the very least try to dress up an otherwise lame boxed mix. That is just what these babies are all about! They are the can’t decide between a chewy chocolate chip cookie and a heavenly cupcake? HAVE BOTH cookie cake!

Blog 4 - CCC

Ingredients:

Cupcakes:

1 white or vanilla boxed cake mix of your choice.
Water - according to directions
Oil - according to directions
Eggs - according to directions
1 Cup Mini Chocolate Chips - plus more for garnishment.
1 TBSP of all purpose flour.
Paper cupcake/muffin liners.

Butter Cream frosting:

2 Cups shortening
2 tsp clear vanilla
7 TBSP of water
2 pounds of confectioner's sugar

Cookies:

1 pkg of Betty Crocker Chocolate Chip Cookie Mix
1/2 Cup of Butter - 1 stick
1 Egg
Regular size chocolate chips for garnish

Directions:

Cupcakes:
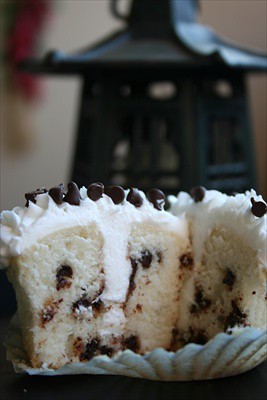
Mix and prepare according to directions on package. Toss 1 Cup of mini chocolate chips with 1 TBSP of all purpose flour. Fold into prepared batter. Bake according to directions. Allow to cool completely.

Butter Cream Frosting:
Beat all ingredients until icing forms peaks (7-10 minutes at low speed with a heavy-duty mixer, 10-12 minutes at high speed with a hand-held mixer).
NOTE: Keep all utensils completely grease-free for proper icing consistency.
* For stiffer icing, use 1 tablespoon less water.
**When using large countertop mixer or for stiffer icing, use 1 tablespoon less water.

*Instructions can be found on the Wilton website.

Cookies:
Prepare and bake cookies according to directions.

Once cupcakes have fully cooled, I used a long cake decorator’s tip to fill the middle of the cupcake with frosting. Take the longest tip you have (preferably one with a round open end), insert it into the middle of the cupcake and squeeze. Next frost the entire top of the cupcake with butter cream frosting. Style it according to your choice. (I decorated mine using only a pastry bag with a coupler inside.) Make sure you add an extra bit of frosting to the top center of the cupcake. Next you'll want to shake a good amount of the mini chocolate chips onto a plate, roll cupcake in chocolate chips. The way I did this was dip down and lift, turn slightly, dip down and lift until all sides are thoroughly covered. Next place a well shaped chocolate chip cookie on top of the frosted cupcake slightly tilted to the side. Top with a dollop of butter cream. Last but not least, garnish with a larger sexier chocolate chip and there you have it chocolate chip cookie cakes! Enjoy!

Blog 5 - CCC


Wednesday, July 22, 2009

Chocolate Chip Cookie Cups - my latest cookie creation!

Blog 2 - CC

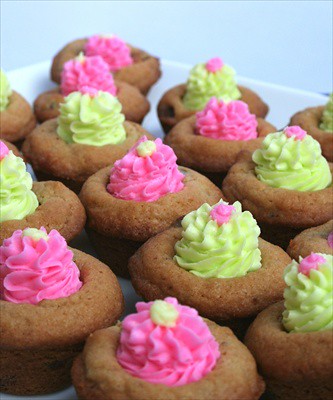
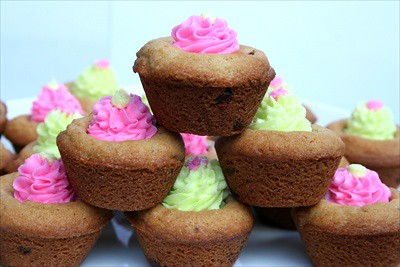
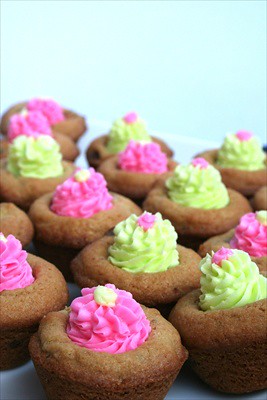
Some things just go to be together: Peanut butter and Jelly, Bread and Butter, Batman and Robin, Movies and Popcorn, Smoke and Fire, Shoes and Socks the list could go on and on, AND now Cookies and Butter Cream Icing! These are two of my favorite things, and what do you do with two of your favorite things? Find a way to put them together to live in perfect harmony, which is just what these little bits of deliciousness are all about. You see one day I had left over cookie dough AND left over butter cream icing. Come on admit it, we've all had the lazy days where we think “you know what I could do with that frosting? No wait that would mean I have to make cupcakes. Or look at that left over cookie dough, but wait we just had chocolate chip cookies.” Out of this dilemma was born the cookie cup! When left in an office without a definition attached to them they have been known to be called “cookie muffins, chocolate chip cupcakes, “Mookies” or Cuffins.”
Will originally thought it would be too sweet but quickly realized the love affair between the two could not be denied. He now loves them as much as I do, as do his co-workers, friends and family.
Blog 4 - CC
As for the recipe you can use your own favorite top secret cookie dough, the one found here, or on occasion I have even (gasp) used the Betty Crocker chocolate chip cookie mix. Either way as long as they are a chewier type cookie it will work like a charm. I used the same process that I did with the Cookie Bites with the addition of making an indentation in the middle of the cookie after they are removed from the oven but prior to them cooling (if you wait too long after they begin to cool, they will crack). After they cool completely go back and pipe in butter cream icing into the center cavity. The recipe for butter cream icing can be found here or again you could use your own super secret formula. Auden said they are two thumbs up and she would "give them more thumbs up but I don't have any more thumbs”. :) Hope you enjoy them as much as we do!

Blog 1 - CC


Friday, July 10, 2009

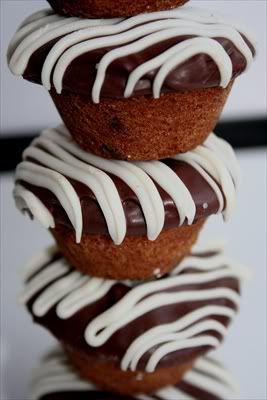
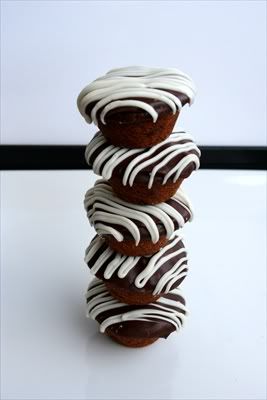
Not the same "chip" off of the old block - Chocolate Dipped, Chocolate Chip Cookie Bites

Photobucket

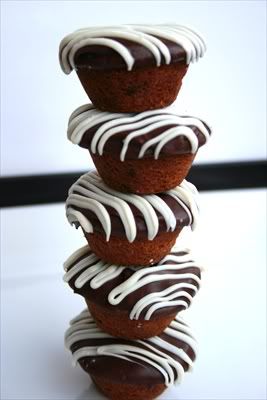
I won't bore you with a lot of blah, blah, blah about this recipe. The fact of the matter is, I should be cleaning my house but instead I'm baking and blogging. I have been brainstorming this for the past few weeks, and I'm actually still NOT totally thrilled with the outcome, taste (HECK YES THEY ARE DELICIOUS!!), but as for appearance I would like it to look, I don't know - cuter? I would like to have them on a lollipop stick, then dipped and use all kinds of decorations (think sprinkles, nonpareils, etc, etc), but like I said I'm supposed to be elbow deep in domesticated bliss (laundry, dusting and cleaning toilets), but instead I'm baking, so for now this is what I had time (or lack thereof) to pull together. Hope you enjoy them as much as I am!!
Photobucket

Ingredients:

3 cups of all purpose flour
1 tsp baking soda
1/2 tsp salt
1 cup of unsalted butter
1 cup of light brown sugar
1/2 cup of granulated white sugar
2 large eggs
2 tsp of pure vanilla extract
10 ounces of semi-sweet chocolate chips
Wilton Candy Melts in both chocolate and white chocolate
Candy decorations of your choice (optional)

***NOTE*** This recipe will make quite a few cookies so I cut it in half for this project.

Directions:

*Preheat oven to 350.
*Combine first three ingredients in a bowl and set aside.
*In a large bowl, cream together butter and both sugars with mixer until fluffy.
*Add eggs one at a time and beat well.
*Mix in vanilla
*Add dry ingredients and combine well.
*Fold in chocolate chips.
*Generously grease a mini muffin pan
*Place one scoop of cookie dough into each mini muffin cup - I used a cookie scoop, but you can also use approx 1 heaping tsp full of dough (as I said the muffin cup will be a little more than 2/3 full)
*Bake for 10-15 minutes or until lightly brown. Allow cookies to cool for 5 minutes, and then transfer to a wire rack.
* Once the cookies have completely cooled, melt the Wilton Candy Melts (see directions for melting chocolate here.
*Dip the top of the cookie into the chocolate and garnish with your choice of decorations - another flavor of chocolate, candy decorations, frosting - you're the boss - let your imagination run wild!!!
* Refrigerate just long enough (approx. 5 min) for the chocolate to set.

ENJOY!!!!
Photobucket

Friday, June 26, 2009

Decorated Sugar Cookies - Fourth of July Style

Cookies blog 1

*WARNING* - These piping skills leave A LOT to be desired!! If one could interview when decorating cookies I would have added "steady hands need only apply". But in the end, you get the idea of where I'm going with this. Plus what can you expect for an up all night, toddler hanging on my pants at 3 am, 2 cans of soda kinda girl???

In my attempt to continue to find that "just right - WOW factor" item to take to the upcoming Fourth of July picnic scene, I introduce you to the frosted sugar cookie- Fourth of July style. I LOVE frosted sugar cookies and once you get the hang of it (which obviously I'm still learning to do) it really becomes quite fun. Just outline the cookie with butter cream icing first - recipe can be found in this post. Then use flood icing to fill in the rest of the cookie. (Pros: correct me if I'm wrong in my description, but flooding the cookie is like zig zagging the thinner icing over most of the cookies surface and then using a tooth pick or such to spread it around and fill in the gaps.) After the flood icing has begun to set up (and learn from my mistakes - don't have the central air vent blowing directly onto your cookie while working with the flood icing as it will begin to set FAST!), decorate with your choice of icing or frosting, and let your imagination take over from here! Allow icing to set - at least 4-6 hours or overnight I find is best (nothing worse then trying to arrange them and having them start to drip down the cookie before your very eyes - so sad).

Cookies blog 2

Frosted Sugar Cookies - recipe from Gold Metal Flour

Ingredients & Directions:

Cookies:
1 1/2 Cups powdered sugar
1 Cup butter or margarine - I used unsalted butter
1 tsp vanilla
1/2 tsp almond extract - I didn't use this because Will is allergic to nuts and I wasn't sure if this would kill him or not.
1 egg
2 1/3 Cups Flour
1/2 tsp baking soda

In large bowl, beat powdered sugar and butter on low speed or with spoon until light and fluffy. Stir in vanilla, almond extract and egg. Stir in flour and baking soda. Cover and refrigerate at least 2 hours. Divide dough in half. Roll each half 1/4 inch thick on lightly floured surface. Cut into desired shapes. If cookies will not be frosted, sprinkle with sugar, sprinkles or decorations of your choice. On ungreased cookie sheet, place cutouts 2 inches apart. Bake 7 to 8 minutes or until edges are light brown. Immediately remove from cookie sheet to cooling rack.


Royal Flood icing (makes 2 1/2 cups - from Martha Stewart Cookies book):
1 Pound of confectioners' sugar, sifted
5 TBSP meringue powder
Scant 1/2 cup water

* I found that I needed to add a bit more water. A good judge in testing the flood icing is to place it on a suface - I use a plate, and drag a spoon through it to create a line, a good flow icing consistency should fill back in by the time you count to 10, anything faster or slower needs to be adjusted by adding more water or sugar until desired consistency is reached.

ENJOY!!!!

Tune in tomorrow for info about my first giveaway!!!!

Saturday, June 13, 2009

What happens when brownies and cookies get together??? Brookies!!


I am NEEDING to bake BIG TIME - BUT I am still not up to standing for any length of time to bake, soooooo I did the next best thing - I used a box mix - gasp - I know me use a box mix, right? I did and I'm darn proud of it! You will be too after you see the results!!! The recipe just fell into my lap and I KNEW I had to make it for dessert tonight!!! It is from Betty Crocker’s website and I will copy and paste the recipe. Take my word for it when I tell you how delicious this was. I liked it, the kids liked and the dog stole SEVERAL pieces from the kids table so I know he liked it too. We also mixed it up a bit and smothered it with ice cream, hot fudge and whipped cream. The recipe shows it iced with chocolate frosting, but I didn't have any so I just made do with what I had. Trust me when I say I don't think you will miss it a bit if you don't have any either. Okay enough of the rambling, here is the recipe....

1 box Betty Crocker® Original Supreme brownie mix (with chocolate syrup pouch)
1/3 cup vegetable oil
1/4 cup water
2 eggs
1 pouch (1 lb 1.5 oz) Betty Crocker® chocolate chip cookie mix
1/2 cup butter or margarine, softened
1 egg
1 container Betty Crocker® Rich & Creamy chocolate frosting

1. Heat oven to 350ºF. Spray bottom only of 13x9-inch pan with cooking spray, or grease with shortening. Make brownie mix as directed on box, using oil, water and 2 eggs. Spread in pan.
2. Make cookie mix as directed on pouch, using butter and 1 egg. Drop dough by rounded tablespoonfuls evenly onto brownie batter; press down lightly.
3. Bake 35 to 40 minutes or until toothpick inserted 2 inches from side of pan comes out almost clean. Cool on cooling rack 30 minutes. Frost with frosting.

Here's the link if you'd like to bookmark it for yourself. http://www.bettycrocker.com/recipes.aspx/chocolate-chip-cookie-dough-brownies?Source=SearchResultPage&terms=cookie%20dough%20brownies

ENJOY!!!