Monday, August 17, 2009

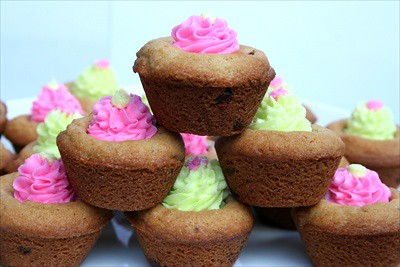
Chocolate Chip Cookie or Cupcake? HAVE BOTH! Chocolate Chip Cookie Cakes

Blog 1 - CCC

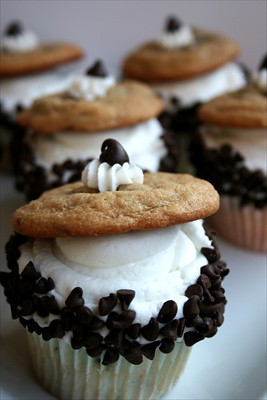
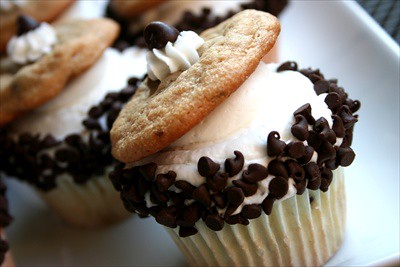
Some things a girl should never tell…her age, her weight and her favorite recipe that has potential to make money for her someday. For that very reason I wanted to make one of my favorite cupcake ideas, but I’m not quite ready to share my secret recipes for my homemade goodies yet. Wipe your tears from your eyes my friends, this one is just as good and I’ll tell you are secret, come a little closer, shhhhhhhhh, it is all made from boxed mixes with the exception of the frosting. Will came in and said “are those homemade?” to which I lovingly answered “Well they were made in our home!” LOL. But ladies and gentlemen that is as close to homemade as these get. When I can’t or don’t want to use “from scratch” recipes, I like to at the very least try to dress up an otherwise lame boxed mix. That is just what these babies are all about! They are the can’t decide between a chewy chocolate chip cookie and a heavenly cupcake? HAVE BOTH cookie cake!
Blog 4 - CCC

Ingredients:

Cupcakes:

1 white or vanilla boxed cake mix of your choice.
Water - according to directions
Oil - according to directions
Eggs - according to directions
1 Cup Mini Chocolate Chips - plus more for garnishment.
1 TBSP of all purpose flour.
Paper cupcake/muffin liners.

Butter Cream frosting:

2 Cups shortening
2 tsp clear vanilla
7 TBSP of water
2 pounds of confectioner's sugar

Cookies:

1 pkg of Betty Crocker Chocolate Chip Cookie Mix
1/2 Cup of Butter - 1 stick
1 Egg
Regular size chocolate chips for garnish

Directions:

Cupcakes:
Mix and prepare according to directions on package. Toss 1 Cup of mini chocolate chips with 1 TBSP of all purpose flour. Fold into prepared batter. Bake according to directions. Allow to cool completely.

Butter Cream Frosting:
Beat all ingredients until icing forms peaks (7-10 minutes at low speed with a heavy-duty mixer, 10-12 minutes at high speed with a hand-held mixer).
NOTE: Keep all utensils completely grease-free for proper icing consistency.
* For stiffer icing, use 1 tablespoon less water.
**When using large countertop mixer or for stiffer icing, use 1 tablespoon less water.

*Instructions can be found on the Wilton website.

Cookies:
Prepare and bake cookies according to directions.

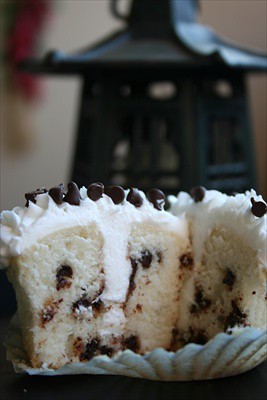
Once cupcakes have fully cooled, I used a long cake decorator’s tip to fill the middle of the cupcake with frosting. Take the longest tip you have (preferably one with a round open end), insert it into the middle of the cupcake and squeeze. Next frost the entire top of the cupcake with butter cream frosting. Style it according to your choice. (I decorated mine using only a pastry bag with a coupler inside.) Make sure you add an extra bit of frosting to the top center of the cupcake. Next you'll want to shake a good amount of the mini chocolate chips onto a plate, roll cupcake in chocolate chips. The way I did this was dip down and lift, turn slightly, dip down and lift until all sides are thoroughly covered. Next place a well shaped chocolate chip cookie on top of the frosted cupcake slightly tilted to the side. Top with a dollop of butter cream. Last but not least, garnish with a larger sexier chocolate chip and there you have it chocolate chip cookie cakes! Enjoy!
Blog 5 - CCC


Tuesday, August 4, 2009

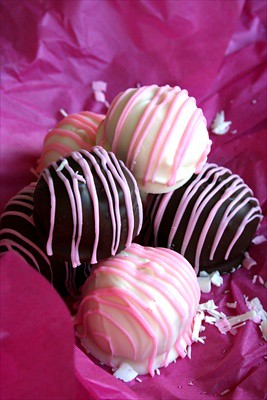
Recycling cake scraps.... Chocolate Covered Strawberry Cake Balls

Blog 3 - CB

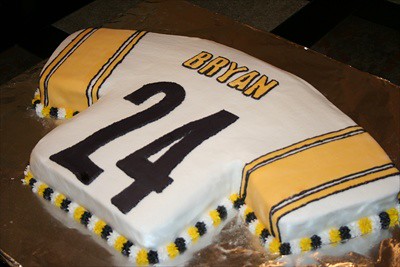
I don't know what to call these, I mean they are essentially cake balls BUT for whatever reason that just sounds so gross to me. They need a more chic name like cake truffles or cake bon bons, something. I should hold a contest to name my personally made ones. Too bad I didn't think of this sooner it would have been a perfect give a way! Bakerella does some FABULOUS things with these little delicious delights! You have to see all of the things she comes up with. Plain and simple, she ROCKS! Check her site out for complete directions and so many fabulous ideas! You can visit her by clicking here. I adapted mine slightly using vanilla frosting instead of cream cheese basically because I usually make my own frosting and therefore do not have usually have a can of store frosting around BUT I did have a can of vanilla that I found for a project that never came to be - ummmm, yeah I have way to many "good ideas" to mention that happen like that. The land of forgotten baked goods. You know those ingredients that end up being used for something other than their original intent. Oh well, all’s well that ends well right? I had cake scraps from a birthday cake that I made over the weekend. (The Steelers jersey birthday cake (for Bryan turning 24 - Happy Birthday Bryan!!!) that I mentioned in a previous post.) Blog 2 - SJ

NOTE: For the correct and entire recipe please see Bakerella's blog!!!

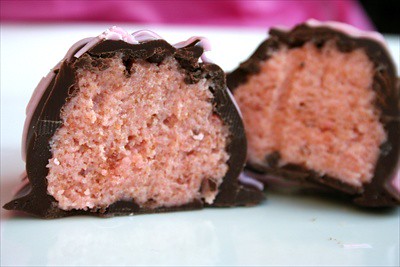
I used the cake scraps - or the left over cake from two 13 x 9 strawberry cakes - the crown (or top) which was cut off of both of them and about a quarter of the other 13 x 9 that I used to carve the sleeves. All in all it was probably about half of a whole 13 x 9. Did I lose you yet with all of that?

Blog 4 - CB

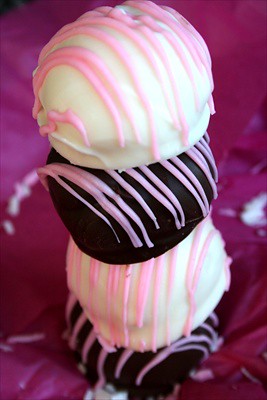
I crushed up all of the strawberry cake scraps to get them into crumbs and mixed about half of the can (15.6 oz) of vanilla frosting. Once I made sure it was thoroughly mixed, I used a cookie scoop and made approx 1 inch balls. I placed them on a cookie sheet with wax paper and placed them into the freezer for approx 6 hours until set. Once they were set enough to dip, I melted 1.5 bags of Wilton Candy Melts. (for directions on melting chocolate see my post here) (I have used Almond bark in the past). I used a toothpick inserted in the middle of the cake ball to dip into the chocolate. Once completely covered I placed on a cookie sheet covered with wax paper, drizzled on the opposing chocolate flavor and placed in the refrigerator until it was set. Viola! There you have cake balls (truffles- bon bons- LOL)! Recycling never tasted so good! ENJOY!

Blog 5 - CB

Thursday, July 30, 2009

Making fondant "pregnant" - the latest addition of Stacy bakes...

Blog 1 - PL

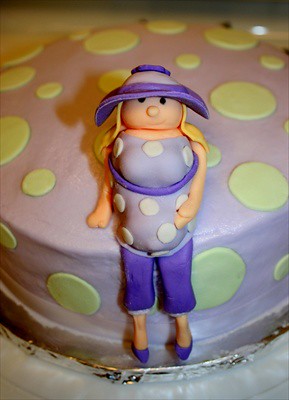
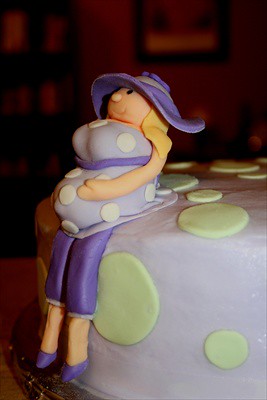
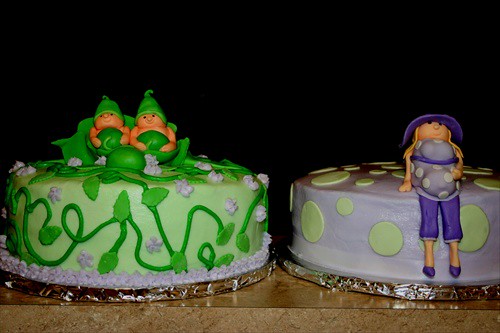
WOW, has it really been that long since I posted anything? Time sure does fly! In short, I have been up to my elbows in frosting and cake batter (and loving every minute of it!) I promise to be back in the next day or two with some actual recipes but for now I will entertain (and distract) you with some cakes that will hopefully make you smile! These were for Will's co-worker. She is pregnant with twins!!! How wonderful!!! Today is her last day before maternity leave and they are having a potluck luncheon for her. I was requested to make two round cakes both with butter cream (UGH - I just can't get used to seeing butter cream after working with fondant! I'm totally obsessed with getting it as smooth as possible to try to resemble fondant). They are both 9 inch rounds - one is white cake the other is strawberry. The figures on top are made totally of fondant. This was the first time I actually tried my hand at making figures. How'd I do?

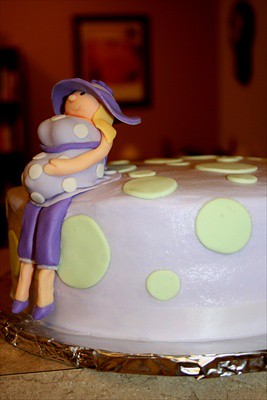
Here she is from the side -
Blog 3 - PL

The colors were lavender and mint green to match the nursery colors.
Blog 2 - PL

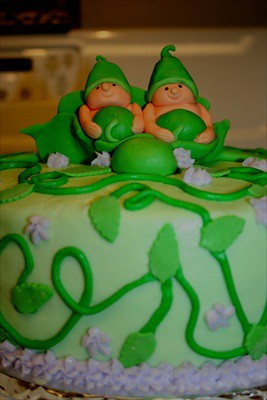
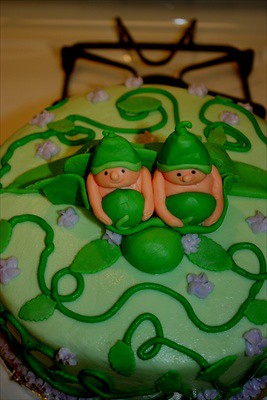
Next we have the two peas in a pod, pea pod cake. I got my inspiration from this site. I think these are Will's favorites!
Blog 4 - PP

Here they are again looking down from the top. I also tried to incorporate the nursery colors in this one by including the little lavender flowers.
Blog 5- PP

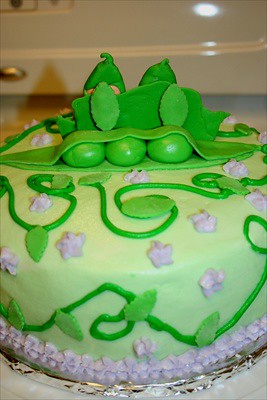
If you love that, wait until you see the back! Here it is - a huge pea pod!!! I needed support for the little guys as I knew Will would be driving on the freeway, alone, in a manual transmission car, so I knew it needed TONS of support - hence the giant pea pod.
Blog 6 -

In addition to these I had an order for a dozen blueberry muffins that I fresh baked at 1 am! Today is my "day off" and boy do I need it!!! I have another cake that is due on Saturday - a Steelers cake - imagine the irony of it all - a Pennsylvania girl living in California making a Steelers cake for a California man! Too funny! Poor Will, tomorrow is our 5th year anniversary and he'll be lucky to get cake scraps for our anniversary dessert. Oh the life of a baker!!! Hope you enjoyed them! Thanks for looking!
Blog 7 - both cakes

Wednesday, July 22, 2009

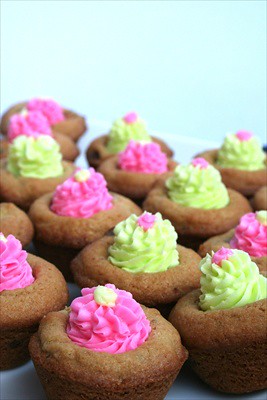
Chocolate Chip Cookie Cups - my latest cookie creation!

Blog 2 - CC

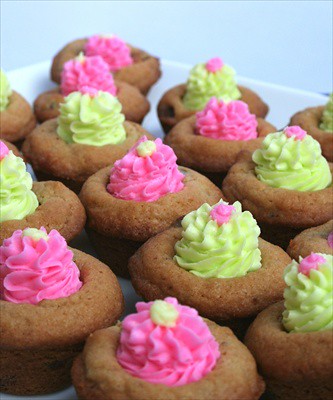
Some things just go to be together: Peanut butter and Jelly, Bread and Butter, Batman and Robin, Movies and Popcorn, Smoke and Fire, Shoes and Socks the list could go on and on, AND now Cookies and Butter Cream Icing! These are two of my favorite things, and what do you do with two of your favorite things? Find a way to put them together to live in perfect harmony, which is just what these little bits of deliciousness are all about. You see one day I had left over cookie dough AND left over butter cream icing. Come on admit it, we've all had the lazy days where we think “you know what I could do with that frosting? No wait that would mean I have to make cupcakes. Or look at that left over cookie dough, but wait we just had chocolate chip cookies.” Out of this dilemma was born the cookie cup! When left in an office without a definition attached to them they have been known to be called “cookie muffins, chocolate chip cupcakes, “Mookies” or Cuffins.”
Will originally thought it would be too sweet but quickly realized the love affair between the two could not be denied. He now loves them as much as I do, as do his co-workers, friends and family.
Blog 4 - CC
As for the recipe you can use your own favorite top secret cookie dough, the one found here, or on occasion I have even (gasp) used the Betty Crocker chocolate chip cookie mix. Either way as long as they are a chewier type cookie it will work like a charm. I used the same process that I did with the Cookie Bites with the addition of making an indentation in the middle of the cookie after they are removed from the oven but prior to them cooling (if you wait too long after they begin to cool, they will crack). After they cool completely go back and pipe in butter cream icing into the center cavity. The recipe for butter cream icing can be found here or again you could use your own super secret formula. Auden said they are two thumbs up and she would "give them more thumbs up but I don't have any more thumbs”. :) Hope you enjoy them as much as we do!

Blog 1 - CC


Tuesday, July 21, 2009

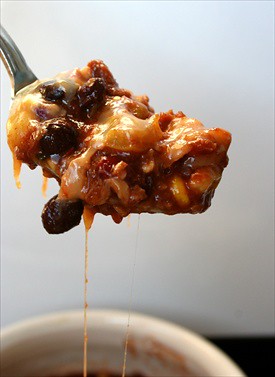
It might be warm out side but it's "Chili" here! - Vegetarian (and meat lovers) Sweet Chili

Blog 1

Okay readers; please don't hate me for this recipe. I will warn you in advance that this is a "William Original" which means no measuring on the spices. So, it's "to taste" when you get to the spices part of it. Trust me, I know, try living with him. :) On a positive note this chili won second place in a chili cook off several years ago at Will's work. Still to this day he is so proud of his second place finish and dollar store ribbon which he received as his prize. It's the little things in life people...

What makes this chili different is in the fact that is it sweet - but after visiting this blog, would you expect it to be anything less than that? I will type it out both ways for either our vegetarian counter parts or our meat loving friends as well. Either way you go, you won't go wrong with it! But on a side note, I will say that Will's second place award winning chili was made with the Morningstar Farm Crumbles and only AFTER they ate it and voted did they find out who made the chili (as the crock pots weren't marked) did they realize that they weren't really eating meat. The other nice thing about using the crumbles is that it makes it lower in fat, BUT like I said either way - vegetarians or omnivore, I will love you all the same either way you try it, it's not trying it at all that will make me give you the evil eye. :) Okay enough of the mindless chatter and poor attempts at humor, on to the recipe!

Blog 3

Ingredients:

1 pkg of Morningstar Farms Crumbles (ground beef substitue) or approx 1 pound of groud beef *NOTE* I say approx. because I have obviously never cooked with it but on our vegetarian substitute it states that one bag of meatless crumbles is the equivelent of 1 pound of ground beef.

1/2 jar of chili sauce (12 oz jar)- approx 3/4 of a cup

2 TBSP of Extra Virgin Olive Oil

2 or 3 strips of sweet roasted red pepper strips (approx 1/4 cup finely chopped)

2 TBSP of ketchup

1 Can (15 oz) of red kidney beans - drained

1 Can (15 oz) of black beans - drained and rinsed

1 3/4 Cup of crushed tomatoes

1 can (4 oz) of diced green chilies - drained

1 1/2 TBSP of minced garlic

1/4 cup of finely chopped green bell pepper

1 can (15.25 oz) of Whole Kernel Sweet Golden Corn - drained

5 tsp sugar

Cumin and cilantro to taste - (I warned you!)

Mexican Style Shredded Cheese blend - Optional

Directions:

*In a medium sauce pan brown meatless crumbles or ground beef in 2 TBSP of olive oil

* Finely chop sweet roasted red peppers and green bell pepper. Add to ground beef mixture

* Add chili sauce, ketchup, kidney beans, crushed tomato, green chilis, minced garlic, black beans, corn and sugar.

* Cook on medium to low heat for 30-40 minutes.

* Sprinkle top with Mexican Style Shredded Cheese Blend - optional

ENJOY!


Monday, July 20, 2009

The Power of Fondant - Fondant Attempt - Take 2

Photobucket

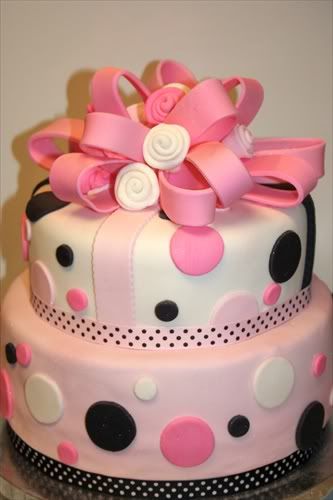
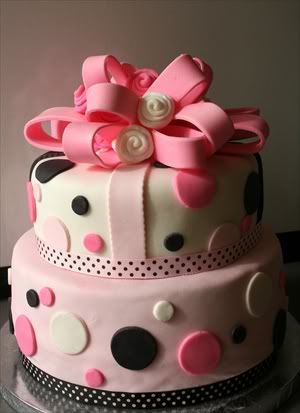
(Cue the dramatics) - I'll just say it, I have issues people! LOL. What is it about fondant that can bring a grown woman to tears? I mean come on, in the end it's just cake people! But yep that was me over the weekend. After my first fondant attempt last weekend, Will showed the cake to one of his co-workers (which is one of the sweetest people you will ever want to meet), and she ask if I could make a cake for her sisters birthday. The butter cream part of me screamed - "Sure no problem" and then I learned she wanted a two tiered fondant covered cake - UGH- the sick in the pit of your stomach feeling took over. The confidence turned from "Sure, no problem!!!!! to sure......no problem.... As you know this would only make this my second attempt at a fondant cake and NEVER have I had to stack heavy tiers on top of one another which meant supporting the cake by inserting dowel rods. I was a mess with worry to say the least. Then on top of all of that, "if" I ended up pulling the whole thing off, I had to worry about carrying it down 3 flights of stairs, and drive pass 5,000 speed bumps to get out of our complex. "If" we made it that far, we were left with driving a half an hour in a manual transmission car, on the freeway to deliver the cake, so sure......no problem.....

But I am happy to report all’s well that ends well. As you can see I pulled it off. Not to say that MANY "heart attack moments” didn't pop up along the way. My first issue, the fondant was sticking to my counter in the worst way. So I added powdered sugar BUT if I continued to add powdered sugar so that it wouldn't stick, it would quickly dry it out (okay and I'm sure the location of the central air vent in our kitchen blowing right on it didn't help matters), but I discovered you MUST make sure you surface is clean and I when I say clean I mean clean, clean. I think I was just wiping the surface thinking it was clean BUT you could feel powdered sugar residue left over from the previous rolling. Plus I needed to roll out a larger piece than I had ever previously done due to the fact that it was a tiered cake. After numerous attempts both cakes were covered. I'm not sure if it's just me but that is the worst part in my opinion. After the cakes are covered I totally love the decorating part of it. The next stressor was the adding of the dowel rods to give support when you stack the cake. It becomes so heavy with fondant that you don't want to have the bottom layer collapse when you place the top tier onto the bottom cake. First, you need to cut the dowels just right, about 1/16th lower than the cake is what I did, and you need to place them just slightly inside the perimeter of where the top cake will be placed. MAN, someone should warn you how stressful cake decorating can be; it was like me being a new surgeon operating for the first time. Will was my "assistant" handing me the dowel rods and cheering me on. Just watching yourself insert the rods into the bottom cake (and therefore destroying the flawless finish you just spent forever creating) and hoping you measured correctly is nerve wracking to the fullest extent. Next came placing the top tier onto the bottom, (or in layman’s terms - waiting for the bottom cake to collapse when you let go.....) My "assistant" had the important job of watching to see if any bulging occurred, and the first sign of it I wanted him to say "problem" and I would quickly remove the top as to save at least one half of the cake from total destruction. But guess what? It didn't happen!!! Next came Will wiping sweat from my brow, and me placing the center dowel rod down through the entire thing. If I made it through this I was going to celebrate with a nice margarita or two or three. Much to my surprise it went much smoother than my nerves would ever allow me to believe it could be. I had to just step back at that point and say "I did it”!!! I was so excited I think I cried happy tears. :) Sure there are a few minor flaws I have to work out and things I really would have been "better" with the cake but overall I guess for the stepping into to virgin cake baking territory (I’ve never taken a cake decorating class in my life) I didn't do too bad, did I?

Okay here is my list of questions for the fondant fans.....

* Other than the counter having some residue, is there anything else that could be making it stick? I am using the Marshmallow fondant recipe as seen here.

* I noticed that I got a few air bubbles even after I smoothed it out, any tips on how NOT to have that happen?

* What do you do it you accidentally mark the fondant after it is on the cake - like a finger nail scrap as you put the decorations on to the cake. Is there a way to smooth it out?

* How do I achieve a more realistic bow affect? I tried and still don't totally like how my bow creation turned out despite following an absolutley AWESOME bow making tutorial here (if you are a baker/cake maker you MUST check out there site for the most amazing software to assist you in running your business.)

* How long do you wait until you put ribbon on the bottom of the cake if you are indeed doing that so that it doesn't appear that it is bulging over the ribbon (and I also think I put it on too tight).

In the end, I did what I set out to do; I baked it, assembled it and transported it all in one piece, AND still lived to write this post. I guess it's true what they say, what doesn't kill you will make you stronger. I promise I’ll be back shortly with an actual recipe. Thanks to all who got this far in the post for my “therapy session”. You can all send me your bill in the mail.

Oh and on a side note - how many times can I say fondant and tiers in one post? I think I just set the record. :)

Photobucket


Friday, July 17, 2009

Oven Baked Parmesan Seasoned Fries

Photobucket

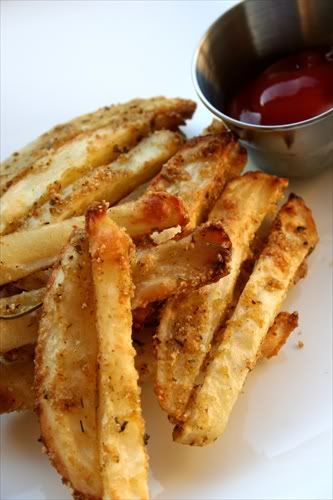
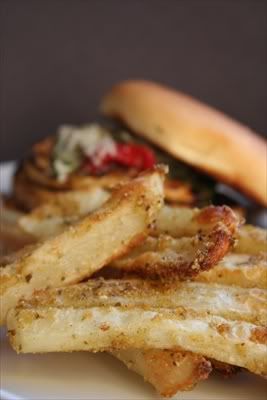
These fries ROCK plain and simple. Funny how one would still call them "fries" when really they are not "fried" in anything. Nope, these fries are too sophisticated for greasy oil, and much like a skinny swim suit model they prefer to be lightly oiled, slightly accentuated by a few minor spices and baked lying on a cookie sheet basking in the golden glow of the oven, BUT the one thing that sets these fries apart from the skinny swim suit model is that you can actually LOVE them instead of secretly hating them :)

When we were still in PA, my neighbors RAVED over them and I mean RAVED! They could smell the wonderful aroma coming from the windows in the spring and would say "Oh my gosh" someone is cooking something that smells delicious! I once made the mistake of calling them "healthy French fries" and very promptly these little fry guys lost their appeal— that is UNTIL they tasted them!!! A few of the "manly men" of the neighborhood were still the naysayers of the bunch and only relented in a feeble attempt to silence my pleas to try them. Then it happened, they liked them, no wait they LOVED them!!! They urged their wives to get the recipe. So I typed it up and before you know it that very familiar smell began filling the air on our tiny little street. I just KNOW you are going to love them too, but whatever you do, don't call them healthy!!! :)

Photobucket

Oven Baked Parmesan Seasoned Fries

NOTE: The amounts listed are for every one pound of fries. One pound of fries is the equivelant of appoximately 3 medium potatoes. (I just double or triple the recipe to fit within my needs).

Ingredients:

1 pound of medium russet potatoes (approx 3 medium potatoes)
1 1/2 TBSP of Extra Virgin Olive Oil
1/4 tsp Dried Thyme
1/4 tsp Dried Oregano
1/8 tsp Dried Rosemary
1/4 tsp of Garlic Powder
1/4 tsp of Old Bay Seasoning
2 TBSP of Kraft Parmesan Style Grated Cheese (I used reduced fat)

Directions:

*Preheat oven to 425.
*Wash and cut potatoes into 1/8ths.
*Place on a cookie sheet that has been lined with foil (I used Reynolds Release foil so that they will not stick, but you could also either use non-stick cooking spray or lightly grease the top of the foil with extra virgin olive oil).
*Mix all of the spices and the parmesan cheese in a small bowl.
*Place all of the potatoes (remember we are talking about one pound at a time) into a gallon size freezer bag, add olive oil and the parmesan cheese/spice mixture to the bag.
*Seal the bag and shake until the potatoes are evenly coated.
*Once thoroughly coated dump onto the prepared cookie sheet and spread in a single layer.
* Bake 30-45 minutes or until tender and lightly golden brown. (Baking times will vary depending on the amount of fries that you make and the size that you cut them). For the ones shown in the picture they were baked at 425 for 45 minutes.

ENJOY!