Thanks so much to all who entered and left such nice comments. I had so much fun with this, so much in fact that I think I am going to do a giveaway at least every other month - so stay tuned for more cool stuff!!!
Drum roll please............ The winner is (and please forgive the crappy iphone picture, as I have no idea how to do an actual screen shot- LOL)......
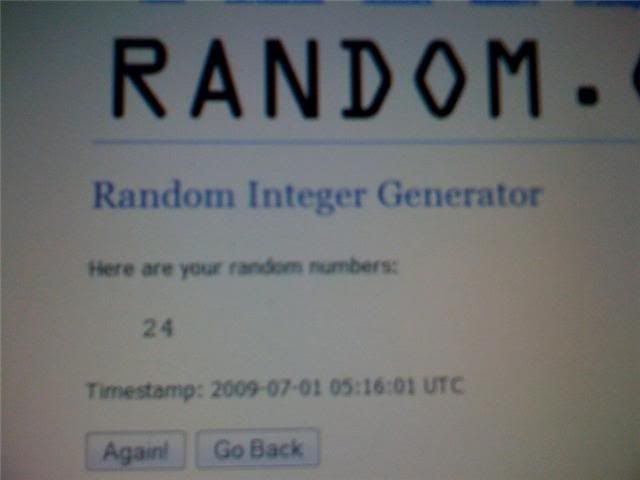
Comment #24 was Stephanie from Ice Cream Before Dinner!!! Thanks Stephanie and I'll be in touch soon!!! CONGRATS!!!!!
It was awesome to see everyone’s favorite summer time dinner and desserts! I blame you all for giving me ideas about "frozen desserts" - and I mean this in the nicest way! Thanks to all of you I ran out and bought an ice cream maker!!!! I have been asking other foodies about it, but was somewhat on the fence about it UNTIL I read all of your posts! I HAD to have one to make all of this deliciousness!!! Will thinks it's a passing fad so I need your help to prove him wrong!!!
Here are some things I learned (and want to learn!!)
* Thanks for giving me the tip about dipping the pretzels in caramel first - Yummmmmmy!!!
* I too LOVE grilling - I could grill morning, noon and night!!!
* Cookie ice cream sandwiches - Oh I MUST try these!!!
* I NEED to try more lemon desserts - ice box pie, pink lemonade pie, lemon curd - can you believe I've never had any of them?
* All of the fruit dish ideas - love them. Nothing better than a dessert disguised with fresh fruit!!! And cobblers, now why didn't I think of that? Frozen watermelon - LOVE, LOVE, LOVE that idea- genius! Shortcakes, muffins and fruit in and on pancakes - totally YUM!
* Corn on the cob - I heart you!!!
* Mango pudding - I will be bookmarking that!
* Homemade potato and macaroni salad and all of the other salads - thanks guys for helping my plan my Fourth of July menu! Nothing compliments a picnic better than those old friends!
* White chocolate ice cream - now this I must look into!!!
* Summer salsa - my husband makes some killer homemade salsa - but I think I'd like to mix it up summer style!!!
* I had to come back to say - "Better than sex cake???" Never had it before BUT sign me up!!!! Anything with that name HAS to be amazing!!!
Oh and Casey - thanks for the compliments! Trust me when I say there will be plenty more, poor old rejected photos in the weeks (or days to come). For anyone who hasn't seen it yet - Casey has a great site for the photos who get rejected at other sites. You have to check it out sometime - http://tastestopping.wordpress.com/. Even the rejects need some love too - (spoken in my best nerd voice with my finger pushing up the center of my glasses). Thanks for showing my pictures some love!!!
Thanks again to everyone for all of your great comments and for visiting my blog! I hope you all continue to check it out and enjoy it as it grows! I can't thank you all enough for all of the kind words and compliments that you have given to me so far! You all really know how to make a newbie feel welcome into the blogging world! Thanks again for all you do and for all of the hard work each and every one of you put into your own blogs! They are greatly appreciated! Thanks for sharing!
Tuesday, June 30, 2009
Saturday, June 27, 2009
Let's take a dip! Chocolate covered pretzels and strawberries. PLUS my very first giveaway!!!
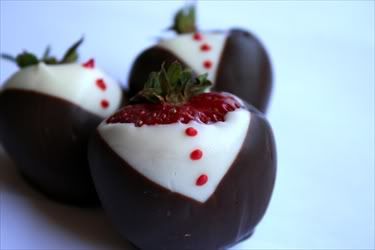
In the last couple of weeks it has come to my attention that my kids will eat ANYTHING that has been dipped in chocolate or has chocolate involved. So when brainstorming for my "Fourth of July" treat ideas, it was a no brainer that this would be one of them and who wouldn't love a pail full of chocolate covered pretzles and strawberries? I also couldn't resisit trying to make "tuxedo" strawberries and boy am I glad I did! Those things are freakin' cute!!! Although there isn't much of a recipe to this I can tell you what I used.
Bag of pretzel rods - once you buy one bag you will become obsessed with standing at the store trying to pick the bag with the least amount of broken ones.
Wilton Candy Melts - I had white for the pretzels, a bag of dark chocolate for the strawberries and a bag of red colored white chocolate for the squiggles.
Instructions are pretty simple - dip in the chocolate and deocorate!! Okay maybe not that simple but here are a few things I've learned along the way:
* If microwaving the chocolate make sure you do it for short intervals at a time (either 30 seconds full power or 1 min on 50% power). Chocolate DOES burn and it happens rather fast. I have heard that you can save it by adding some Crisco to it, but in my experience that is like an urban ledgend because once my has been done it is DONE, no Crisco can save the day.
* Like the in the movie Gremlins - never, never get it wet. The chocolate will "seize" - or in regular terms will get into this big blog of funky chocolate that is impossible to save.
* When making the pretzels and decorating with sprinkles and nonpareils, make sure that you have shaken all of the excess chocolate off of the pretzel rods before sprinkling the decorations on. If not, chocolate will fall off in globs and into the bowl of decorations. Messed up pretzel rods and decorations = not good.
* When drizzling use either a disposable pastry bag or a sandwich bag. I melt my chocolate right in the bag and then cut a very small portion of the corner off. Begin to drizzle by zig zagging back and forth. Start with this motion prior to getting to the item that you are drizzling.
* Allow pretzels and/or strawberries to chill(until completely set)in the refrigerator before packaging.
*I microwave my chocolate for dipping pretzels, but for the strawberries I use a small melting pot (again I have a Wilton). You can use a small crock pot if you have one.
* When using a double boiler (which is what I used to do prior to purchasing my Wilton chocolate melting pot), remove the top pan and fill the bottom of the with just enough water so that it does not touch the bottom of the top pan. Cook on medium heat until you reach a boil (Remeber DO NOT have the chocolate on at this stage). Once it has reached a boil, turn off the heat THEN place the top pan (with the chocolate for melting) on the bottom of the double boiler. If the chocolate begins to harden, repeat the process but make sure you remove the chocolate before you turn the heat back on.
* For the tuxedo strawberries dip entirely in white chocolate. Place in refrigerator and wait for the white chocolate to harden. After it is set, bring back out and dip one side at an angle into regular chocolate, lift and repeat dipping the other side. Decorate buttons with a toothpick that has been dipped in chocolate of an alternate color.
ENJOY!!!
KEEP READING TO FIND OUT ABOUT MY GIVEAWAY!!!!
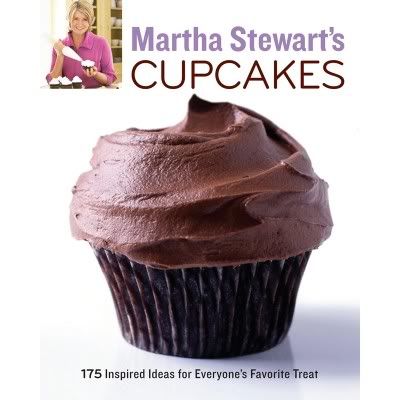
So here it is my first giveaway!!! Drum roll please....... Up for grabs is this wonderful little cookbook you might have heard about, from a very creative lady you might have heard about. Without further ado I present you to, Martha Stewart's Cupcake book!
Photo is courtesy of http://www.marthastewart.com/
To win this wonderful book here's all you have to do:
1.) Leave a comment on this post telling me what your favorite summertime dinner or dessert is (feel free to link your blog as well!). Remember to leave contact information with either your email or your own blog.
2.) Deadline to enter is 8pm PT on Tuesday June 30, 2009. The winner will be announced on Wednesday morning on this post.
3.) The winner will be chosen at random by random.org - random number generator.
GOOD LUCK and thanks for visiting my blog!
Friday, June 26, 2009
Decorated Sugar Cookies - Fourth of July Style
*WARNING* - These piping skills leave A LOT to be desired!! If one could interview when decorating cookies I would have added "steady hands need only apply". But in the end, you get the idea of where I'm going with this. Plus what can you expect for an up all night, toddler hanging on my pants at 3 am, 2 cans of soda kinda girl???
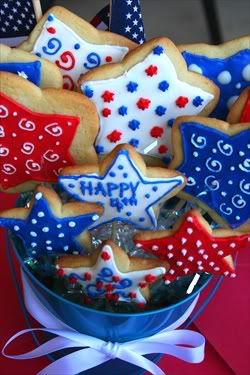
In my attempt to continue to find that "just right - WOW factor" item to take to the upcoming Fourth of July picnic scene, I introduce you to the frosted sugar cookie- Fourth of July style. I LOVE frosted sugar cookies and once you get the hang of it (which obviously I'm still learning to do) it really becomes quite fun. Just outline the cookie with butter cream icing first - recipe can be found in this post. Then use flood icing to fill in the rest of the cookie. (Pros: correct me if I'm wrong in my description, but flooding the cookie is like zig zagging the thinner icing over most of the cookies surface and then using a tooth pick or such to spread it around and fill in the gaps.) After the flood icing has begun to set up (and learn from my mistakes - don't have the central air vent blowing directly onto your cookie while working with the flood icing as it will begin to set FAST!), decorate with your choice of icing or frosting, and let your imagination take over from here! Allow icing to set - at least 4-6 hours or overnight I find is best (nothing worse then trying to arrange them and having them start to drip down the cookie before your very eyes - so sad).
Frosted Sugar Cookies - recipe from Gold Metal Flour
Ingredients & Directions:
Cookies:
1 1/2 Cups powdered sugar
1 Cup butter or margarine - I used unsalted butter
1 tsp vanilla
1/2 tsp almond extract - I didn't use this because Will is allergic to nuts and I wasn't sure if this would kill him or not.
1 egg
2 1/3 Cups Flour
1/2 tsp baking soda
In large bowl, beat powdered sugar and butter on low speed or with spoon until light and fluffy. Stir in vanilla, almond extract and egg. Stir in flour and baking soda. Cover and refrigerate at least 2 hours. Divide dough in half. Roll each half 1/4 inch thick on lightly floured surface. Cut into desired shapes. If cookies will not be frosted, sprinkle with sugar, sprinkles or decorations of your choice. On ungreased cookie sheet, place cutouts 2 inches apart. Bake 7 to 8 minutes or until edges are light brown. Immediately remove from cookie sheet to cooling rack.
Royal Flood icing (makes 2 1/2 cups - from Martha Stewart Cookies book):
1 Pound of confectioners' sugar, sifted
5 TBSP meringue powder
Scant 1/2 cup water
* I found that I needed to add a bit more water. A good judge in testing the flood icing is to place it on a suface - I use a plate, and drag a spoon through it to create a line, a good flow icing consistency should fill back in by the time you count to 10, anything faster or slower needs to be adjusted by adding more water or sugar until desired consistency is reached.
ENJOY!!!!
Tune in tomorrow for info about my first giveaway!!!!
Wednesday, June 24, 2009
Bruschetta Pasta - it's not just for bread any more!
Will used to make bruschetta in it's original form on garlic bread. If you've eaten at our home you know it has been transformed and eaten in several ways. We used to put it on top of garlic bread or toasted Italian bread topped it with mozzarella cheese and baked it. It was pure heaven. We found that most restaurants that we went to served it cold, so of course we followed their lead. We began toasting bread topped with butter and garlic powder and served the bruschetta cold. One night we decided "hey let's see what this would be like on pasta" and the rest ladies and gentleman is as they say history. Born was bruschetta pasta and my life will never be the same. This is best served with toasted garlic bread, a salad and a nice bottle of wine (or bottles if it's been one of those days with the kids and a Jack Russell who is the worlds worst dogs - just sayin'). A perfect dessert would be to pair this delightful meal with the cheesecake recipe listed here.
Bruchetta Pasta
Ingredients:
1 box angel hair pasta
1 28 oz can of diced tomatoes or we prefer 6 fresh (ripe) diced Roma tomatoes
6 tsp sugar - more to less according to taste
2 TBSP of minced garlic
2 TBSP of balsamic vinegar
3 TBSP of extra virgin olive oil
Basil to taste - can you tell this is Will's job? - thanks for measuring - MEN!!!
Shredded parmesan cheese - for garnish
Directions:
Boil pasta according to directions on box.
Mix tomatoes, sugar, minced garlic, balsamic vinegar, extra olive oil and basil in a medium sauce pan, cook for 15 min. or until it is warm and the tomatoes are tender. Garnish with shredded parmesan cheese.
Enjoy!
Chocolate Chip Cheesecake - a better late than never Father's Day treat!
After looking at this I think the better title would have been better late than never chocolate chip cheesecake because it was a Will's Father's days dessert choice and by the date of this post you see it was just a tad bit late -oops! Will loves cheesecake so I had no doubt in my mind when I ask him what he wanted for his Father's Day treat that he would say some type of cheesecake. I really do like cheesecake, but for some reason I don't care for cheesecake with sour cream in it. Not sure what my hang up is about it, but perhaps I just haven't found the right recipe (a hint for any of your fellow foodies who have a good recipe with sour cream - please include your link!) I will also give the recipe sans chocolate chips for those who would rather have your cheesecake plain Jane (as I would), as well as some other ideas on how to dress up your cheesecake!
On an unrelated topic, I have decided that coming up in my next few posts I will be making Fourth of July inspired desserts! I think it will be a fun way to get ideas for the holiday weekend coming up. What do you think? Anything you'd like to try or would like to see?
Philadelphia Classic Cheesecake (with chocolate chips)
Recipe can be found at http://www.kraftfoods.com/
Prep Time: 20 min
Total Time 5 hr and 15 min
16 servings
Ingredients:
Crust:
1-1/2 Cups graham cracker crumbs
3 TBSP Sugar
1/3 Cup butter or Margarine
Filling:
4 pkg (8oz each) cream cheese softened
1 Cup sugar
1 tsp vanilla
4 eggs
1/2 Cup of mini chocolate chips mixed and coated with 1/2 TBSP of flour (optional)
Directions:
Preheat oven to 325 F, if using a springform pan (or to 300 F if using a dark nonstick spring form pan). Mix crumbs, 3 TBSP sugar and butter, press firmly onto bottom of pan. *NOTE* you can also use a ready made graham cracker crust but when I do this, this recipe will yield two cheesecakes.
Beat cream cheese, 1 cup of sugar and vanilla with electric mixer on medium speed until well blended. Add eggs 1 at a time, mixing on low speed after each addition just until blended. If you are adding chocolate chips, take 1/2 cup of mini chocolate chips and coat them with 1/2 TBSP of flour (this will prevent the chips from sinking to the bottom of the cheesecake). Fold in by hand. Pour over crust.
Bake 55 minutes or until center is almost set. Loosen cake from sides of pan, cool before removing side of pan (you can skip this step if you are using a pre-made crust) Refrigerate 4 hours or overnight. Store leftover cheesecake in refrigerator.
Additional info:
* I have found that my cheesecakes don't crack if I place them either on a cookie sheet that has been filled with water half way up the side of the sheet or else by placing a cookie sheet filled with water on the rack below where my cheesecakes are baking.
* Again, I can double this recipe, making two cheesecakes if I follow the same directions and use pre-made crusts. I usually do one plain and one with extras in the mix.
* Extras I have used include chocolate chips, crushed oreos, and swirling in various types of jams (blueberry, strawberry) after the filling has been added to the pan.
* My personal favorite is to eat plain and garnish with flavored pie filling or fresh fruit.
ENJOY!
Saturday, June 20, 2009
Fourth of July cupcakes - all dressed up and ready to go!!!
While on my recovery from surgery, I have rediscovered the abilitly to dress up a good old cake mix and make it special in your own way (call me a baking snob it's the ONLY way I can bring myself to using a boxed mix). Last night I was so tired after cleaning up the house and making a batch of pizza dough (recipe can be found here), but that didn't stop the kids from demanding that they wanted to make cupcakes. I did what all tired, at the end of her rope mothers do and grabbed a box of white cake mix and let my mind do the rest!!! Needless to say everyone involved was pleased with the results! I think that bringing these cuties to any Fourth of July gathering will leave you having the sensation of the event!
PS.) Will thinks they remind him of bomb pops. What do you think?
Fourth of July Cupcake Cuties
Ingredients
One white box cake mix of your choice
Butter Cream Icing - See recipe below
Wilton red and blue coloring paste
Cupcake papers
Directions
1. Prepare cake mix according to directions on the box.
2. Divide prepared mix into three containers - I used a digital kitchen scale and measured each one to be approximately 10 3/4 oz.
3.) After all 3 containers are equally divided tint one container with red coloring and the other with blue. Leave the remaining container white.
4.) Fill each cupcake liner with all three colors (I did them red, followed by while and blue on top). For each color I used between 1.5 to 2 tsps. dropping one on top of another. I tried to smooth each color out being careful not to dig or disrupt the color below.
5.) Bake according to directions on the box.
6.) Allow to cool for completely before frosting.
Butter Cream Icing
2 Cups shortening
2 tsp clear vanilla
7 TBSP of water
2 pounds of confectioner's sugar
Beat all ingredients until icing forms peaks (7-10 minutes at low speed with a heavy-duty mixer, 10-12 minutes at high speed with a hand-held mixer).
NOTE: Keep all utensils completely grease-free for proper icing consistency.
* For stiffer icing, use 1 tablespoon less water.
**When using large countertop mixer or for stiffer icing, use 1 tablespoon less water.
NOTE: Keep all utensils completely grease-free for proper icing consistency.
* For stiffer icing, use 1 tablespoon less water.
**When using large countertop mixer or for stiffer icing, use 1 tablespoon less water.
*Instructions can be found on the Wilton website.
Decorating Ideas:
I tinted my royal icing red and blue (leaving the remaining white). I used various Wilton tips to make the different size stars. They would also be cute with cupcake toppers as well as sprinkles. I think the next time I make them I might actually do them from scratch and flavor the cake them making them strawberry, blueberry and vanilla.
Enjoy!!
Thursday, June 18, 2009
Famous pancake recipe
Who needs a pancake house when you have your own kitchen? Not I says the cook from Southern California. Will and I used to love to go out for breakfast and specifically to eat a good quality pancake. I say "used to" because you see we have children now and good pancake or not there is nothing delightful about spending over $35 for breakfast just to have a race with your spouse to see who can eat it first before the "countdown to melt down" begins. Not to mention that more than half of the kids food gets thrown away. The answer to our prayers - find a good substitute recipe and make your own!!! Which is just what I did this week and folks I'm not sure we're ever going back to the dining out for breakfast madness again! Yes, people it IS that good and for the fraction of the cost of one restaurant meal you, can have a dozen pancakes! To those of you who choose to ignore my warning and venture out anyway, I say good luck. Maybe you will have better luck then we do, and when it all goes south my little old blog will be here with your recipe solution. I promise not to say I told you so when you come back! :0)
Recipe from epicurean.com
Ingredients
Nonstick Spray
1 1/4 cups all-purpose flour
1 egg
1 1/4 cups buttermilk (I didn't have buttermilk so I used the substitute of 1 1/4 cup of milk plus 1 TBSP of lemon juice - let sit for 5 min., this will sour the milk and produce the same result as buttermilk)
1 teaspoon baking soda
1/4 cup cooking oil
pinch of salt
Directions
1. Preheat a skillet over medium heat. Use a pan with a nonstick surface or apply a little nonstick spray.
2. In a blender or with a mixer, combine all of the remaining ingredients until smooth.
3. Pour the batter by spoonfuls into the hot pan, forming 5-inch circles.
4. When the edges appear to harden, flip the pancakes. They should be golden brown.
5. Cook pancakes on the other side for same amount of time, until golden brown.
Makes 8 to 10 pancakes.
Don't forget!!!
Remember that in addition to this blog, I also have a baking/cooking message board! Please come visit me over there as well!
http://playwithsugar.hyperboards.com/index.php
Thanks!
Stacy
http://playwithsugar.hyperboards.com/index.php
Thanks!
Stacy
Monday, June 15, 2009
And the winner is Cinnamon Buns!
I guess it's true what they say, Men are from Mars, Women are from Venus - he wants chocolate chip cookies, she wants cinnamon buns and since "she" is the baker cinnamon buns, win by a landslide!
This all started a year or so ago when Will was talking about the Cinnabon company and how good their cinnamon buns are. Since I apparently live under a rock, I have to confess I have never in my 35 years of living had a actual "Cinnabon". But the whole concept of a cinnamon bun being so delicious that one has to rave over it got me curious. At that time we were living in PA and the closest "Cinnabon" was over an hour a way, not really a practical drive to make just for me to sample this urban legend of yumminess, so I did the next best thing, I baked my own!!!
It took me a while to perfect them from unrolling, but I think over time I have found that the tighter you roll them and the closer you put them in the pan the less likely they are to unroll. One other tip that I will give you is to pinch the ends of the dough together after you are done rolling, but prior to slicing.
To my East Coast peeps (also known as friends, family and co-workers) since I left you high and dry where sweets are concerned I know these were one of your favorites! I hope that in my absence the recipe will some how make up for my abandonment of all of your sweet tooth's.
Here is the recipe and I hope that you enjoy them as much as I do!!!
ROLLS:
2 1/4 tsp active dry yeast (I used rapid rise)
1 cup warm milk
1/2 cup sugar
1/4 cup butter
2 eggs
1 tsp salt
4 cups flour
Combine all of the dry ingredients. Warm the milk in the microwave (I warmed mine for 1 min on regular power) to the warm milk add the yeast and the sugar - stir. Allow to sit for a few minutes until the yeast begins to dissolve and foam at the top of the mixture. Add eggs, butter and milk, yeast, sugar mixture to the dry ingredients. Mix until a smooth ball forms (use extra flour as needed). Place in a bowl, cover with a warm, wet towel and away from drafts. Allow to rise for 1 hour.
FILLING:
1 cup packed brown sugar
2 1/2 TBSP Cinnamon
1/3 cup of butter - I used no salt butter
Combine filling and begin rolling out dough. You will want to roll the dough on a lightly floured surface until it's approx. 20-24 inches long and 16 inches wide. It should be approx. 1/4 inch in thickness.
Spread the butter completely over the dough surface. Top with the brown sugar/cinnamon mixture. Working from the long side roll the dough (remember to try to keep the roll as tight as possible. Once completely rolled, pinch the seam to the roll to form a seal. Cut the roll approx every one inch. Place into a greased pan - I used to use a 13 X 9 inch pan and you certainly can do it, but I found that I have better luck with using round cake pans and placing 6 in each pan (including the center position). This recipes should yield approx 16-18 rolls assuming you cut them every one inch.
Preheat the oven to 400 degrees F, bake rolls for 15-20 min until they are lightly golden brown, but not doughy. Do not over bake.
While the rolls are baking, I prepare the cream cheese icing.
CREAM CHEESE ICING:
7 TBSP of butter - you should use actual butter - again I used non-salt
1 1/2 cups of powdered sugar
2 oz or 1/4 cup of cream cheese
1/2 tsp vanilla
Mix until creamy and smooth. When the rolls are done, remove from the oven and cool for 5 minutes. Spread icing on tops of rolls (Will and I keep the icing separate and spread icing on each one individually as we eat them. We also just reheat the left overs and spread the icing on after they have been reheated.
ENJOY!!!
Saturday, June 13, 2009
Grilled Pizza - Yummmmmmm
1 tsp rapid-rise yeast
2 tsp salt
1 1/2 Cups of water
2 TBSP olive oil
3 Cups of all purpose flour (plus more as needed)
In a large bowl combine the yeast, salt, water and olive oil - stir. After the yeast begins to dissolve and begins to foam, pour mixture into dough. I used the dough hook on my Kitchen Aid but I am sure kneading by hand will work fine. Knead until the dough is smooth. If the dough is too sticky add flour until the dough becomes a smooth round ball (if you are using a stand mixer, add the flour until the dough no longer sticks to the mixing bowl. Cover with a damp cloth (away from drafts) and allow to rise for approx 1.5 to 2 hours or when it has doubled in size.
At this point I usually split one batch of dough into 4 smaller balls. I roll out the dough - shape is not too important to me as I think it gives it a more artisan look. I brush both sides with olive oil and hand it off to "the grill master" AKA my husband. You will place the dough directly onto the lower rack of your grill (no need to worry about it falling through, as it almost instantly cooks and turns into the crust). When you reach the desired crispness and color remove it from the grill. We usually grill up all of the 4 smaller pizzas and then go back to add the toppings. At this point you can put them back on the grill rack or we like to put ours on a cookie sheet (although I will warn you the heat probably WILL ruin the bottom of your sheet. We keep one specifically for this) Once the topping and cheese has melted to your liking remove and eat. This is one of my favorite ways to use our grill all year round!!!
What happens when brownies and cookies get together??? Brookies!!
I am NEEDING to bake BIG TIME - BUT I am still not up to standing for any length of time to bake, soooooo I did the next best thing - I used a box mix - gasp - I know me use a box mix, right? I did and I'm darn proud of it! You will be too after you see the results!!! The recipe just fell into my lap and I KNEW I had to make it for dessert tonight!!! It is from Betty Crocker’s website and I will copy and paste the recipe. Take my word for it when I tell you how delicious this was. I liked it, the kids liked and the dog stole SEVERAL pieces from the kids table so I know he liked it too. We also mixed it up a bit and smothered it with ice cream, hot fudge and whipped cream. The recipe shows it iced with chocolate frosting, but I didn't have any so I just made do with what I had. Trust me when I say I don't think you will miss it a bit if you don't have any either. Okay enough of the rambling, here is the recipe....
1 box Betty Crocker® Original Supreme brownie mix (with chocolate syrup pouch)
1/3 cup vegetable oil
1/4 cup water
2 eggs
1 pouch (1 lb 1.5 oz) Betty Crocker® chocolate chip cookie mix
1/2 cup butter or margarine, softened
1 egg
1 container Betty Crocker® Rich & Creamy chocolate frosting
1. Heat oven to 350ºF. Spray bottom only of 13x9-inch pan with cooking spray, or grease with shortening. Make brownie mix as directed on box, using oil, water and 2 eggs. Spread in pan.
2. Make cookie mix as directed on pouch, using butter and 1 egg. Drop dough by rounded tablespoonfuls evenly onto brownie batter; press down lightly.
3. Bake 35 to 40 minutes or until toothpick inserted 2 inches from side of pan comes out almost clean. Cool on cooling rack 30 minutes. Frost with frosting.
Here's the link if you'd like to bookmark it for yourself. http://www.bettycrocker.com/recipes.aspx/chocolate-chip-cookie-dough-brownies?Source=SearchResultPage&terms=cookie%20dough%20brownies
ENJOY!!!